A cutting master can draft a perfect pattern and the shop still loses the garment, because the only person who can cut from it is the person who drew it. Everything that made it correct lives in his head.
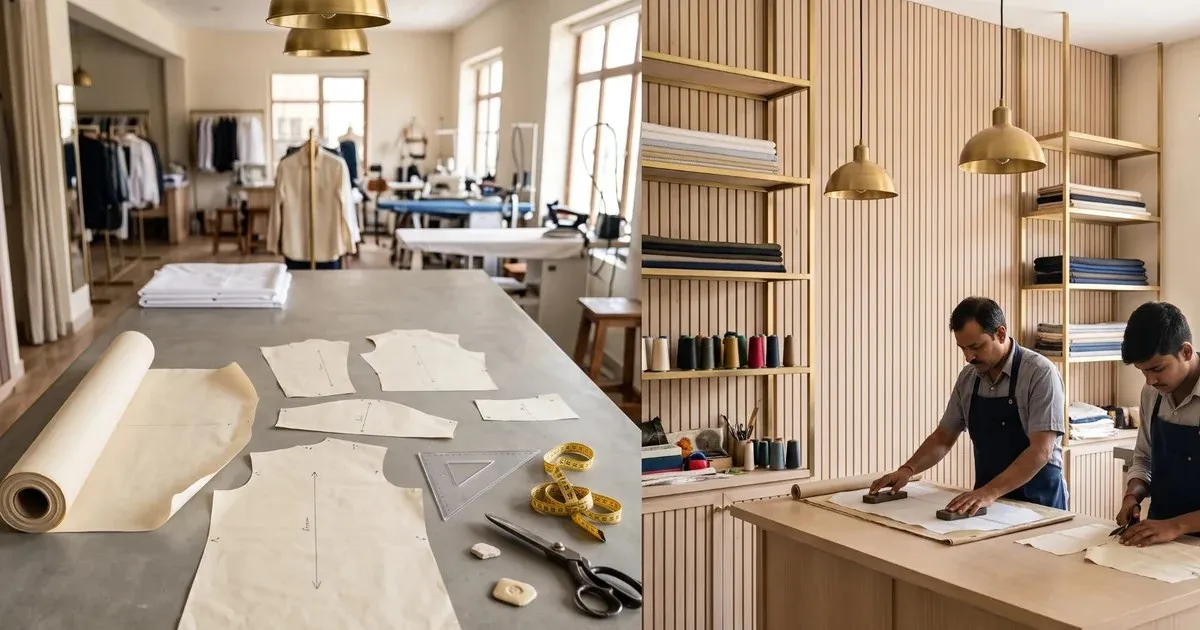
Shirt pattern pieces with grain lines and notches spread on a cutting table while two tailors lay a pattern onto fabric
Marking is what moves that knowledge onto the paper. A grain line says which way the piece lies on the cloth. A notch says which edge joins which, and where. Together they let a second cutter, a new boy, or the same shop next season pick up the pattern and cut it the same way.
It takes about a minute per piece and it is the cheapest insurance in the shop.
In this guide you will find:
- What goes wrong when a piece is not marked
- What the grain line is and how to lay a pattern on it
- Which way the grain runs on each piece
- What each notch means and where it goes
- The marks every cut piece must carry
- When to cut on the cross and on the bias
What an Unmarked Piece Costs You
Four things go wrong, and all four cost cloth.
Only One Person Can Cut It
An unmarked pattern is a personal note, not a shop asset. The day that cutter is on leave, the order waits or somebody guesses.
The Piece Goes On Off-Grain
Laid even a few degrees off, a front panel will twist on the body after the first wash. The stitching is fine, the fit is fine on the table, and the customer still says the shirt pulls to one side.
The Seams Do Not Match
Without notches, a long side seam is joined by eye. One side eases in more than the other, the hem steps at the join, and the only fix is to open it.
Left and Right Get Reversed
Two fronts cut from the same face of the cloth give you two left fronts. On plain white it is a wasted panel. On a printed or napped cloth it is a wasted garment.
What the Grain Line Is
Woven cloth has two sets of threads, and they behave differently:
- The lengthwise grain runs parallel to the selvedge, along the length of the roll. It is the strongest direction and barely stretches. Most pieces are cut on it.
- The cross grain runs selvedge to selvedge, across the width. It has a little give, which is why a garment cut the wrong way round grows at the chest.
- The bias is 45 degrees to both. It stretches freely and drapes, which is useful for binding and piping and wrong for a shirt front.
The grain line arrow on the pattern is simply an instruction: lay this arrow parallel to the selvedge. Nothing more complicated than that.
How to Lay a Pattern on Grain
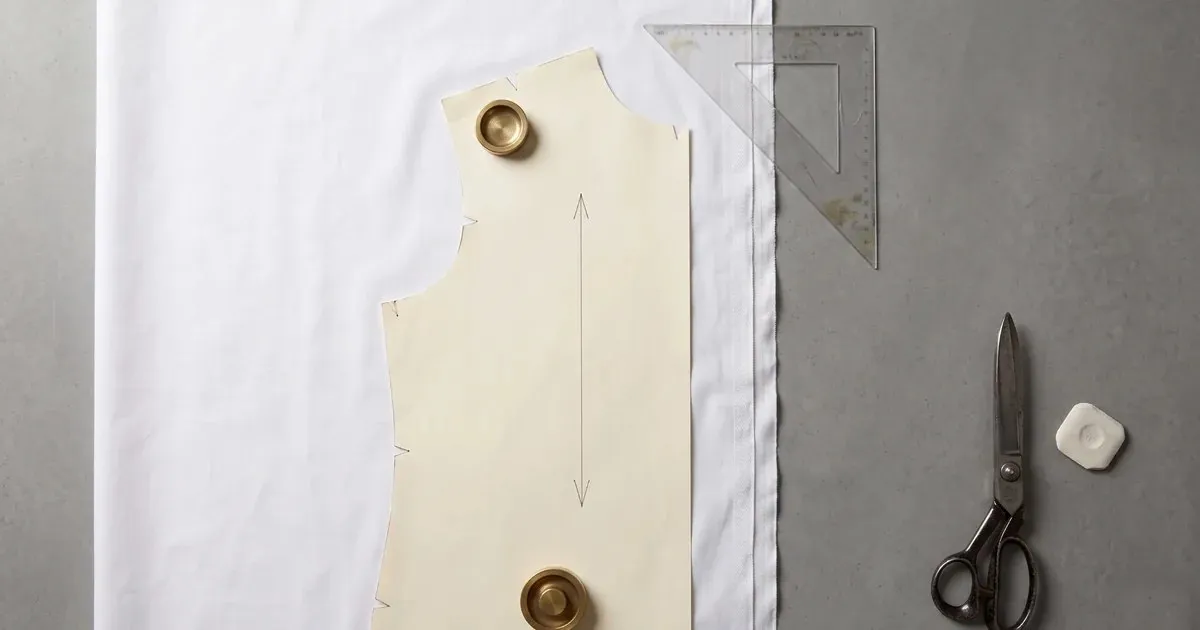
Paper pattern piece weighted onto fabric with a grain line arrow running parallel to the selvedge and notches snipped into the edge
Do it with a rule, not by eye:
- Find the selvedge, the finished edge that runs down the length of the cloth.
- Place the pattern piece roughly where it should go and read the arrow on it.
- Measure from one end of the arrow to the selvedge. Note the figure.
- Measure from the other end of the arrow to the selvedge. Move the piece until both figures are the same.
- Weight or pin the piece down before marking. A piece that shifts while you chalk it is off-grain again.
- Mark the notches as you cut, with a small snip no deeper than three millimetres so it never reaches the stitching line.
How deep that stitching line sits is in our seam allowance guide for tailors, and laying the whole set economically is covered in how to reduce fabric wastage in tailoring.
Which Way the Grain Runs on Each Piece
Piece | Grain runs | Why |
|---|
Shirt front and back | Parallel to centre front / centre back | The panel hangs straight and will not twist |
Sleeve | Down the centre of the sleeve | Stops the sleeve spiralling round the arm |
Collar leaf and stand | Along the length | Keeps the collar flat and stops it stretching |
Yoke | Across, or lengthwise for a plain cloth | Across gives a little give across the shoulders |
Waistband and cuff | Along the length | The strongest direction, so it does not grow |
Facings and plackets | Same as the piece they sit on | Two pieces on different grains will not lie together |
Binding and piping | 45 degrees to the selvedge | Bias stretches, so it turns a curve without puckering |
What Each Notch Means
Notches are a shop convention, so the only rule that really matters is that everyone in your shop uses the same one. This is the convention most Indian shops already follow:
Notch | Where it goes | What it tells the tailor |
|---|
Single | Front armhole, front side seam | This is a front piece, and this edge joins the front |
Double | Back armhole, back side seam | This is a back piece |
Wide or triple | Centre front, centre back | The centre line, matched first when joining |
Shoulder notch | Shoulder seam | Match point for front to back |
Pair on the sleeve cap | Either side of the cap | The ease is spread between these two marks |
Hem notch | At the hem fold | Where the hem turns up |
Snip outwards into the seam allowance, never inwards past the stitching line. A notch cut too deep becomes a hole in the finished garment.
The Marks Every Piece Must Carry
- The piece name, written clearly — front, back, sleeve, yoke, collar stand.
- How many to cut, and whether it is cut on the fold.
- The grain line arrow, ruled the full length of the piece, not a short stub.
- All notches, marked on the paper before the first cut so they are never forgotten.
- Dart points and pocket positions, marked with a small punched hole or an awl mark.
- The size, if the shop keeps a graded set.
Those last two matter most once a pattern exists in several sizes — our guide to pattern grading for tailors covers how the set is built.
Cutting on the Cross and on the Bias
Off-grain cutting is a decision, not a mistake, as long as it is marked on the piece. A yoke cut on the cross gives a little movement across the shoulders. A binding cut on the bias turns a neckline without a single pucker. A whole dress cut on the bias drapes beautifully and needs more cloth and more skill.
Which cloths behave well off-grain is part of which fabric for which garment. A checked or striped cloth also has to be matched across the seams, which is a second reason to get the grain right first.
In tailoring CAD the grain line, the notches, the piece name and the cut quantity are part of the pattern itself and print on every piece automatically, in every size. Nothing is written by hand and nothing is left off. Our tailoring CAD software page shows how a piece comes off the printer ready to lay.
Questions Tailors Ask
What is a grain line on a pattern?
A straight arrow drawn on the piece showing which way it must lie on the cloth. The arrow is laid parallel to the selvedge, the finished edge running down the length of the fabric.
What happens if a piece is cut off-grain?
It twists. The garment can look correct on the table and still pull to one side on the body, usually after the first wash. It cannot be pressed out.
How deep should a notch be?
About three millimetres, cut outwards into the seam allowance. Deep enough to see on a bundle of pieces, never deep enough to reach the stitching line.
Why single notches on the front and double on the back?
So a tailor can tell a front from a back and an armhole from a side seam without laying the pieces out. It is a convention, not a rule, but the whole shop has to use the same one.
Can I cut a shirt on the cross grain to save cloth?
You can, and it will not hang the same. The cross grain has give, so the chest grows with wear. Save cloth by laying the marker better, not by turning the main panels.
Do I still need to mark the pattern if CAD prints it?
CAD prints the marks for you, which is the point. The marks still have to be right in the draft — the software reproduces what it is given.
Mark It Once, Cut It Right Every Time
A marked pattern is the difference between a cutting master's skill staying in his head and belonging to the shop. It costs a minute a piece and it is what lets a second person cut the same garment the same way.
Book a free demo – on-site or online, in your language, with no commitment. Bring a pattern you cut by hand and we will draft and mark it on screen while you watch.