Seam allowance is the strip of fabric between the stitching line and the cut edge. It is easy to treat as an afterthought – “leave a little extra” – but it decides whether the pieces join accurately, whether the seams finish neatly, whether the garment can be let out later, and how much cloth every order uses. This guide explains how seam allowance differs from ease, typical allowances for each seam, where to leave extra for alterations, how fabric and seam finish change the amount, and how to keep allowances consistent.
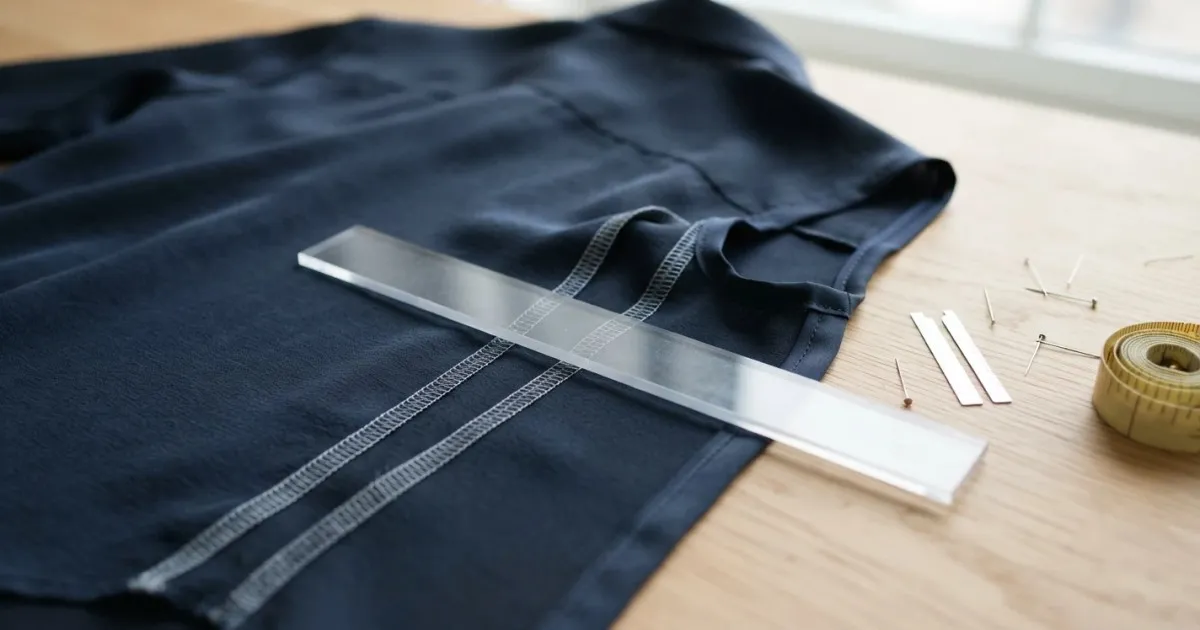
Overlocked seams on the inside of a garment, with a ruler laid across the seam allowance
Turn a garment from a good shop inside out and the seams tell the story. Every allowance is the same width, pressed flat, finished cleanly, with a little extra left exactly where an alteration might be needed later.
Turn a garment from a rushed shop inside out and the allowances wander – wide in one place, almost nothing in another, trimmed so close at the side seam that there is nothing left to let out when the customer comes back after a year.
Neither garment looks very different from the outside on the first day. The difference shows at the first alteration, the first wash and the second order.
In this guide you will find:
Why seam allowance matters more than it looks
The difference between stitching line, seam allowance and ease
Typical seam allowances for each seam
Where to leave extra for alterations
How fabric and seam finish change the allowance
How CAD and laser cutting keep allowances exact
Why Seam Allowance Matters
Four reasons, and every one of them shows up after the garment leaves the shop.
Uneven Allowances Make Pieces Mismatch
When allowances vary along a seam, the tailor stitching it has to guess where the stitching line is. Collars stop matching necklines, sleeves stop matching armholes, and side seams twist.
Too Little Allowance Leaves Nothing to Alter
A blouse trimmed close at the side seam cannot be let out. When the customer needs a little more room, the only option is a new garment – and a disappointed customer.
Too Much Allowance Wastes Cloth and Adds Bulk
Extra width on every seam adds up across a garment, and across a bulk order it adds up to metres. Wide allowances on curves also make necklines and armholes bulky and hard to turn.
Allowance Depends on the Seam Finish
An overlocked seam, a French seam and a bound seam each need a different allowance. Using one width for everything means some finishes do not fit inside it.
Stitching Line, Seam Allowance and Ease
Three terms are often mixed up:
The stitching line is where the seam is sewn. It is the true edge of the garment’s shape.
Seam allowance is the fabric outside the stitching line, needed to join and finish the seam.
Ease is extra room inside the stitching line, added to the body measurement so the garment can be worn comfortably.
Ease changes the fit. Seam allowance does not – as long as everyone stitches on the stitching line. That is why the stitching line needs to be clear on every pattern piece.
The measurements those stitching lines are drawn from are in our blouse cutting measurement chart.
Typical Seam Allowances
These are common starting points used by many tailors. Shops differ, and so do fabrics – choose your own standards and write them down.
Seam | Common allowance | Why |
|---|
Side seams | 1–1.5 cm (about ½ in) | Straight seam, easy to join and finish |
Blouse side seams (with alteration margin) | 2–3 cm (about 1 in) | Leaves room to let out later |
Shoulder seams | 1–1.5 cm | Short, straight, often stitched with a stay |
Armhole | About 1 cm (½ in or less) | Curved – a narrow allowance turns smoothly |
Neckline | 0.6–1 cm (¼–⅜ in) | Tight curve, often faced or bound |
Centre back (zip or hooks) | 1.5–2 cm | Room for the closure and its finish |
Trouser centre back | 2.5–4 cm | The main point for letting out the waist |
Hems | 2–4 cm, by garment | Weight for a good fall and room to lengthen |
Whatever you choose, use the same allowance for the same seam on every order. Consistency matters more than the exact number.
Leaving Margins for Alterations
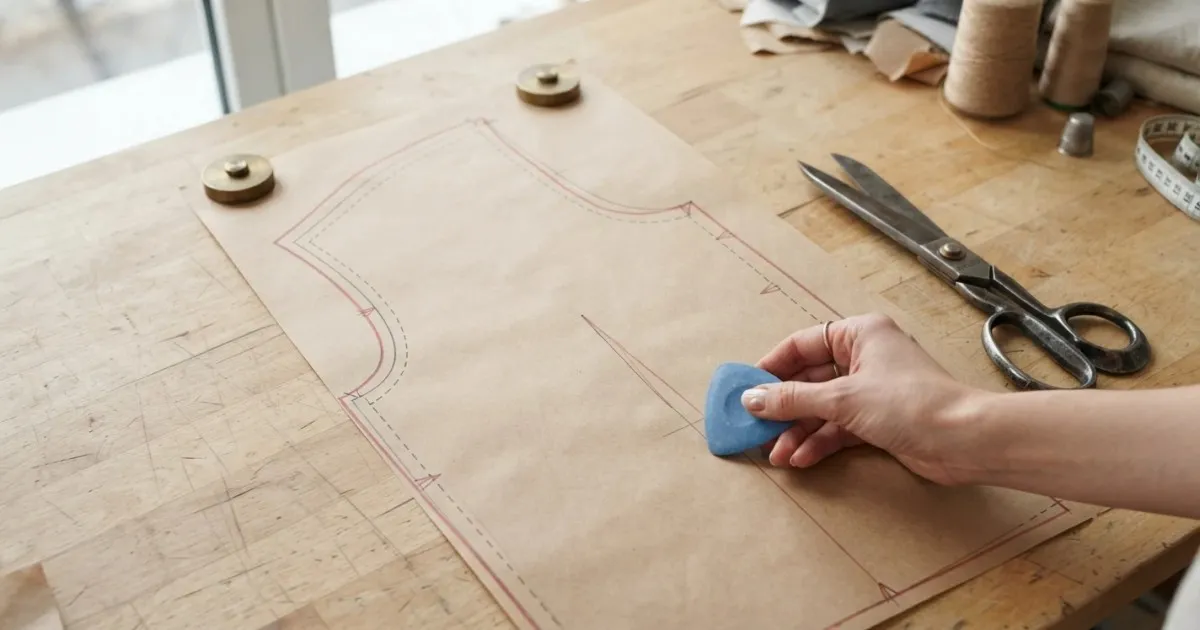
Blouse pattern with the dashed stitching line and the red cutting line drawn parallel, marked with chalk
Some seams are where alterations happen. Leaving extra there costs a little cloth and saves a lot of goodwill:
Blouse side seams – the most common alteration in many shops. A wider margin here lets the blouse be let out later.
Trouser centre back and side seams – the waist can be let out without remaking the trouser.
Kurti side seams – useful when a customer orders well ahead of a function.
Hems on children’s garments and uniforms – a deeper hem can be let down as the child grows.
Mark the stitching line clearly at every margin, so the extra is not stitched into the garment by mistake.
How to use those margins when the customer returns is covered in our garment alteration guide for tailors.
How Fabric and Seam Finish Change the Allowance
The same seam needs different allowance in different cloth and with different finishes:
Fabrics that fray easily, such as some silks and loose weaves, need a little more allowance and a secure finish.
Overlocked seams need enough allowance for the overlock to sit without cutting into the stitching line.
French seams enclose the raw edge in two passes and need slightly more allowance than a plain seam.
Bound or piped seams need allowance matched to the width of the binding or piping.
Thick fabrics and brocades need allowances trimmed or graded on curves to reduce bulk.
Stretch fabrics are often sewn with narrow allowances using an overlock, with less room for letting out.
Common Mistakes
These are the seam allowance mistakes that cause the most trouble later:
Adding allowance by eye while cutting, so it changes along the seam.
Not marking the stitching line, so each tailor sews at a different width.
Trimming every allowance short to save cloth, leaving nothing for alterations.
Using wide allowances on necklines and armholes, making them bulky and hard to finish.
Forgetting to add allowance to small pieces – facings, cuffs, collars – so they no longer match.
Changing allowances between orders for the same customer, so the second garment fits differently.
Seam Allowance in CAD and Laser Cutting
In tailoring CAD software, the pattern is drafted on the stitching line and the shop’s allowances are added automatically – a different width for each seam if you choose, with alteration margins exactly where you want them. Notches are placed on the stitching line so pieces match when they are joined.
When the pattern is printed or plotted full size, the allowance is already drawn. When it is sent to a laser cutting machine, the fabric is cut exactly on the cutting line, so every allowance is the same width on every ply. The differences between printing, plotting, projecting and laser cutting are explained in our guide to pattern cutting machines.
Questions Tailors Ask
What is seam allowance in tailoring?
It is the fabric between the stitching line and the cut edge, used to join and finish a seam. It does not change the fit, as long as the seam is stitched on the stitching line.
How much seam allowance should I leave on a blouse?
Many tailors use about 1 cm at the armhole and neckline and a wider margin at the side seams – often 2–3 cm – so the blouse can be let out later. Choose your standard and keep it the same for every order.
Is seam allowance the same as ease?
No. Ease is extra room inside the garment for comfort and style. Seam allowance is extra fabric outside the stitching line for joining the pieces.
Why are seam allowances narrower on curves?
A narrow allowance on a neckline or armhole turns and presses smoothly. A wide one bunches up and makes the curve bulky.
Should I add seam allowance to the pattern or while cutting?
On the pattern. Adding it by eye while cutting makes it uneven. A pattern with the cutting line already drawn gives the same allowance every time.
Can CAD software add seam allowance automatically?
Yes. The pattern is drafted on the stitching line and the software adds your shop’s allowance for each seam, including any alteration margins.
Make Every Seam the Same
Consistent seam allowances are one of the quiet signs of a well-run shop – easier stitching, neater insides and alterations that are always possible. The quickest way to see allowances added automatically, seam by seam, is to watch a pattern drafted from measurements you brought yourself.
Book a free demo – on-site or online, in your language, with no commitment.