Fabric is the largest single cost in most tailoring work, and the part of it that ends up as scrap is invisible on every bill. This guide is about reducing fabric wastage in tailoring: where it actually goes, how a marker decides it before a single cut is made, and how to measure your own wastage this week rather than guessing at it.
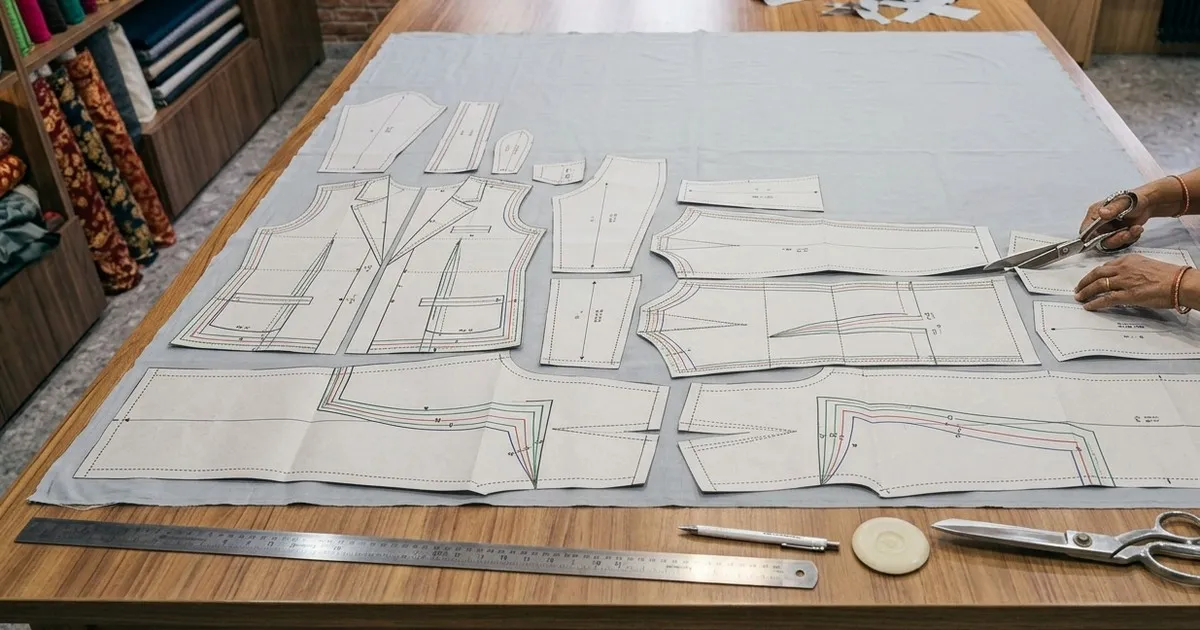
Paper pattern pieces nested tightly on a layer of fabric to reduce wastage on a tailoring cutting table
Every shop knows what a metre of cloth costs. Very few know what their scrap bin costs.
The scrap is not a mistake. It is the difference between how the pieces were laid on the cloth and how tightly they could have been laid. That difference is decided in the ten minutes before cutting, and then it is permanent.
Two cutters given the same pattern, the same fabric and the same order will not use the same amount of cloth. The gap between them, repeated across a year, is real money that never appears anywhere in the accounts.
In this guide you will find:
Where fabric wastage actually goes, item by item
What a marker is, and why it decides the cost before cutting starts
The nesting rules that recover the most cloth
Fabrics that punish a careless layout - checks, stripes, one-way prints
How to measure your own wastage percentage this week
Where the Wastage Actually Goes
It helps to separate the kinds, because they are not all fixable and it is a waste of effort to chase the ones that are not.
Where it goes | What causes it | Can it be reduced? |
|---|
Gaps between pieces | Pieces laid loosely instead of nested | Yes, the most of any kind |
End of the lay | The last piece does not fit in what is left | Yes, by planning the whole lay first |
Selvedge and edges | Unusable width at both sides | Slightly, by choosing the fabric width |
Matching checks and stripes | Extra allowance so the pattern lines up | Partly, never fully |
One-way fabric | Every piece must face the same direction | Partly, with careful nesting |
Cutting errors | Wrong size, wrong side, marked wrong | Yes, and it should be zero |
Shrinkage allowance | Fabric that will shrink after wash | No, this one is necessary |
The first two rows are where almost all the recoverable cloth is. Everything else is either small or genuinely unavoidable.
The Marker Decides the Cost
A marker is the layout of every pattern piece on the width of the fabric, worked out before cutting. It is one sheet showing where each piece sits.
It is not a formality. It is the point at which the fabric cost of that garment is fixed:
Once the pieces are chalked on the cloth, the amount used is settled. Nothing after that changes it.
A marker can be checked, moved and improved on paper. Cloth cannot be uncut.
The same marker, saved, gives the same cloth usage next time - by the same cutter or a different one.
This is the reason the same garment costs different amounts of cloth in different shops, and sometimes in the same shop on different days.
Drafting and nesting pieces is what the pattern making software does before anything reaches the table.
Nesting Rules That Recover Cloth
These are the ones that pay. They are ordinary cutting-room practice, not theory:
Big pieces first, small pieces into the gaps
Lay the largest pieces down first and treat what is left as the space the small pieces must fit into. Doing it the other way round leaves large holes that nothing fills.
Turn pieces head to tail
Most garment pieces are wider at one end. Alternating direction lets the wide end of one sit beside the narrow end of the next. This alone recovers more cloth than any other single habit.
Respect the grain, always
Grain direction is not negotiable, and a piece cut off grain will twist after the first wash. Nest within the grain, never around it.
Plan the whole lay before chalking anything
The commonest loss is a lay that goes well for eighty per cent of the pieces and then leaves the last two with nowhere to sit. That is a planning failure, not a cutting one.
Fabrics That Punish a Careless Layout
Checks, stripes, one-way prints and border fabrics all remove some of your freedom to nest. Decide the extra allowance before quoting, not after cutting. A border saree fabric or a large repeating check can need noticeably more cloth than the same garment in plain material.
Cutting One Layer or Cutting a Stack
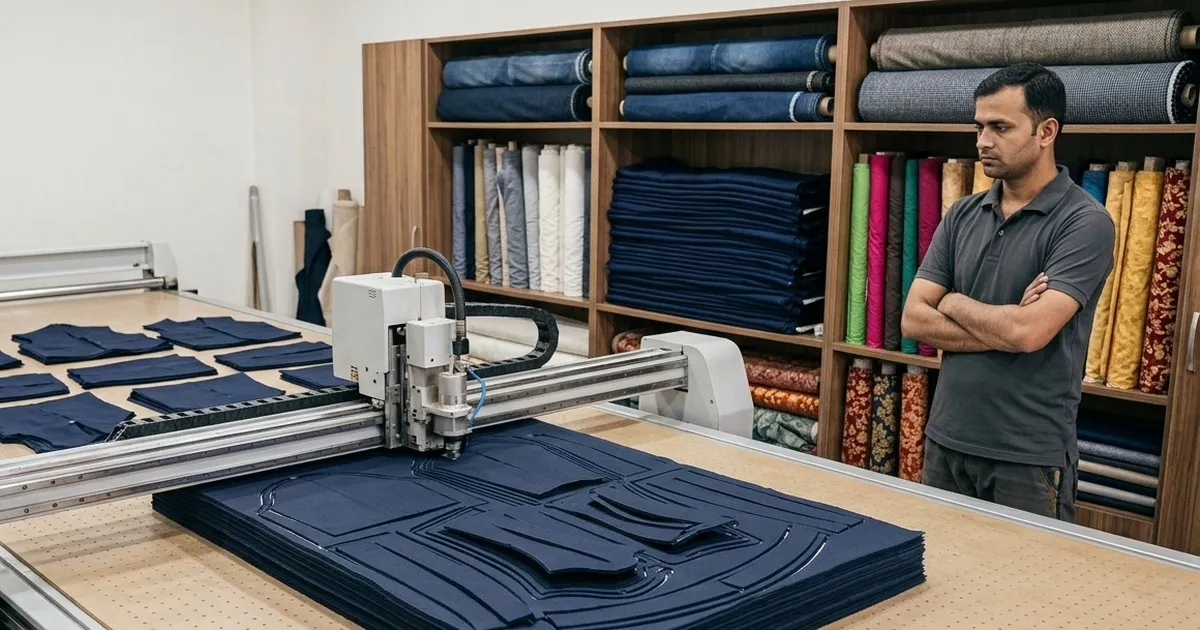
Automatic fabric cutting machine cutting garment shapes through a stack of layered fabric
For single customer orders, one layer is normal. The moment the same garment is being made more than once - uniforms, bulk orders, a repeat design - the arithmetic changes.
| One layer at a time | Stack cutting |
|---|
Suits | Single customer orders | Repeat and bulk work |
Marker | One garment | One marker used for every layer |
Wastage | Repeated for every piece cut | Paid once, spread across the stack |
Consistency | Varies with the cutter | Every layer identical |
Speed | Limited by the cutter | Limited by the machine |
The saving is not only cloth. It is that the tenth garment is cut exactly like the first.
Machine cutting through a stack is covered on the automatic fabric cutting machine page.
For sealed edges on synthetic and export fabric, see the laser cutting machine for garments page.
Sizes Change the Layout, Not Just the Pattern
On any order with more than one size - uniforms, a family order, a repeat design in three sizes - the layout has to be worked out for the set, not for one garment repeated.
A marker made for the medium and then reused for the large leaves gaps that were sized for a smaller piece.
Nesting a large piece beside a small one from another size usually fits tighter than nesting two of the same size.
Grading the pattern and then laying the whole set together is where bulk work stops wasting cloth.
This is the part that is genuinely hard by hand. Grading a set correctly and then nesting all the sizes into one lay is hours of work with paper and chalk, and it has to be redone whenever the order changes. It is also the part where the cloth saving is largest, which is why bulk work and software tend to arrive at a shop together.
Measure Your Own Wastage This Week
Published wastage figures come from export factories cutting hundreds of layers, and they do not describe a tailoring shop. Your own number is worth more, and it takes one week to get.
Step | What to do | Why |
|---|
1 | Pick one garment you cut often | The number has to be comparable |
2 | Record the cloth issued for each order of it, for one week | This is the only figure most shops already have |
3 | Weigh or measure the scrap from each of those orders separately | Keep it in its own bag, not the common bin |
4 | Divide the scrap by the cloth issued | That percentage is your real wastage |
5 | Repeat with the pieces nested deliberately | The difference is what a better layout is worth |
Most shops that do this are surprised twice: once by how large the number is, and once by how much it varies between two people cutting the same garment.
That variation is the argument for a saved marker. A number that moves depending on who is holding the chalk is a number nobody controls.
Mistakes That Waste Cloth
1. Buying Cloth Before Planning the Lay
Especially on a full flare or a bulk order. Work out the lay, then buy. Buying first and laying afterwards is how shops end up with an unusable half metre on every order.
2. Ignoring the Fabric Width
The same garment nests differently at different widths, and the cheaper width is not always the cheaper garment. Compare cloth used, not price per metre.
3. Cutting Without Marking the Whole Lay
Chalking as you go feels faster and is the single most expensive habit in the cutting room.
4. Treating Scrap as Free
It is not free. It was bought at the same rate as the cloth in the garment. A shop that never measures it has no way of knowing whether anything it does is helping.
Questions Shops Ask
What is a normal fabric wastage percentage?
There is no single honest answer, because it depends on the garment, the fabric and the width. Measure your own on one garment for one week, and compare against yourself after that.
Does software actually reduce wastage?
It reduces the variation. The gain comes from the layout being planned and reused rather than redrawn by hand each time, so the good layout becomes the normal one instead of the lucky one.
Is stack cutting worth it for a small shop?
Only when the same garment is genuinely repeated - uniforms, bulk orders, a repeat design. For single customer orders the gain is consistency rather than cloth.
How much extra cloth do checks and stripes need?
Enough that it should be quoted separately. The exact allowance depends on the size of the repeat, which is why it should be decided on the fabric in front of you, not from a rule.
Can leftover pieces be used?
Small pieces are worth keeping for facings, pockets, patti and cuffs, and worth sorting by fabric. That is recovery, though, not prevention. The bigger money is in not creating them.
Should the cutter or the owner decide the layout?
The cutter, but the layout should be saved so that the decision is made once. The problem is not who decides, it is that the decision is made again from scratch every time.
See a Marker Made for Your Own Fabric Width
Bring a garment you cut often and the fabric width you actually buy, and ask for the marker to be made for that width, printed full size, so you can lay it on cloth and see the difference against how it is being cut today.
Book a free demo and bring an order you are cutting this week. On-site or online, in your language, with no commitment.