Turn a well-made blouse inside out and the lining lies smooth, the same shape as the blouse, with every dart and seam sitting on top of its partner. Turn a rushed one inside out and the lining is a size of its own: tight across the back, loose at the waist, and peeping out under the hem.
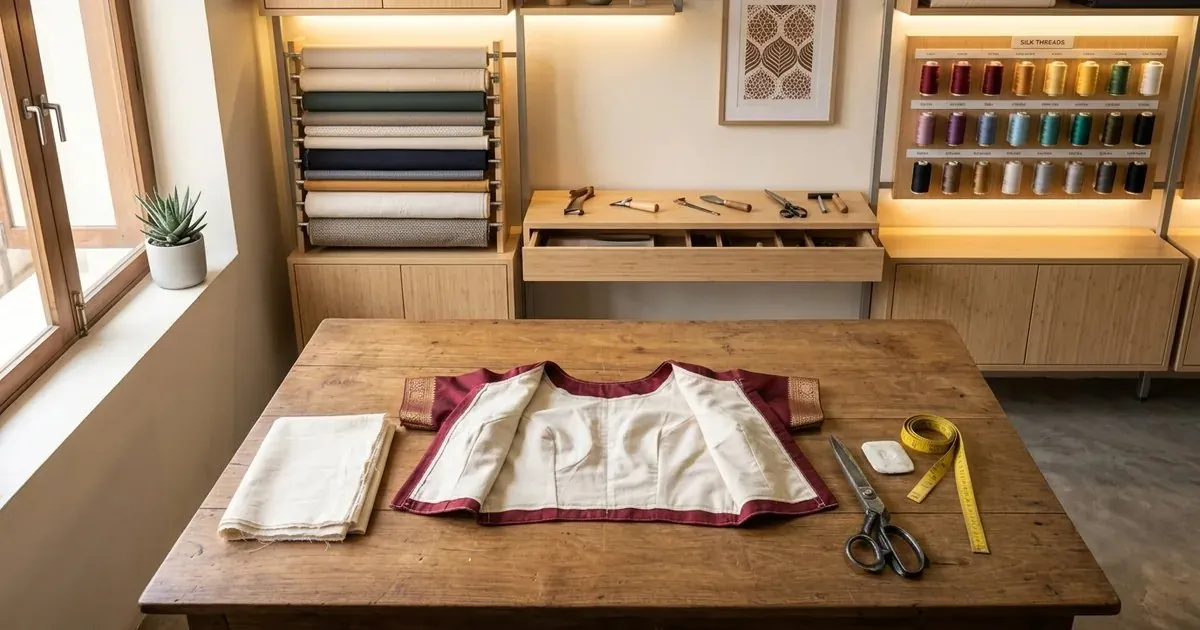
A maroon silk blouse turned inside out on a tailoring table showing its cream cotton lining, with folded lining cloth, shears and chalk beside it
The lining is the layer the customer feels first. It carries the weight of the silk and the embroidery, takes the sweat, and stops a thin fabric from showing every seam. When it is cut or attached badly, the outer cloth bubbles, the blouse pulls at the armhole, and after the first wash the whole garment shrinks a little out of shape.
Almost every one of those faults is made at the cutting table, before a single stitch.
In this guide you will find:
- Why a lining pulls, sags or shows below the hem
- Which lining cloth to use under which fabric
- How much to cut the lining, piece by piece
- How to cut the lining from the blouse pattern
- How to attach it so the two layers work as one
- How the lining changes in a kurti and a coat
Why a Blouse Lining Goes Wrong
Four reasons, and every one of them is decided before the machine is switched on.
The Lining Cloth Was Not Pre-Shrunk
Cotton lining shrinks in its first wash, often by three to five percent. Silk and most synthetic outer fabrics shrink far less. Sew the two together unwashed and the first wash pulls the outer cloth in, so the blouse puckers at the hem and grips at the armhole. Soak the lining before you cut it, every time.
It Was Basted On Flat Over a Curve
The body is round, and the outer layer of a lined blouse travels a slightly longer path round it than the lining does. Two pieces cut the same size and basted together flat on the table leave the outer cloth a fraction short, and it bubbles or ripples over the bust and the shoulder blade.
The Grain Did Not Match
A lining cut off the grain twists inside the blouse and drags the outer cloth with it. The lining piece must sit on the same grain as the outer piece it backs, with the grain line parallel to the selvedge.
The Wrong Lining Cloth Was Used
A stiff lining under georgette shows every seam line through the front. A slippery polyester under a cotton blouse traps sweat. A white lining under a dark sheer fabric shows as a pale patch. The lining has to suit the outer cloth, not just be whatever is on the shelf.
Which Lining Cloth Under Which Fabric
Match the lining to the weight and the wash of the outer fabric. These are working choices that most shops settle on; test a new cloth on a scrap first.
Outer fabric | Lining to use | Why | Pre-wash lining |
|---|
Cotton, handloom | Cotton lining | Breathes and washes the same way | Yes, soak |
Silk, pattu | Soft cotton or cotton-silk | Supports the silk and takes the sweat | Yes, soak |
Georgette, chiffon | Mulmul or soft crepe | Light, does not print seam lines through | Yes, soak |
Net, lace | Shantoon or matching cotton | Gives the colour base and covers the skin | Check colour |
Heavy embroidery, maggam | Firm cotton lining | Carries the weight so the work does not sag | Yes, soak |
Velvet, brocade | Cotton or satin | Smooth against the skin and cuts bulk | Yes, for cotton |
Choose a lining the same colour as the outer cloth or one shade lighter, and hold the two layers up to the light before you cut. To test a dark lining for colour, wet a corner and press it on white paper; if the paper stains, the lining will stain the blouse. More on matching cloth to garment is in our guide to which fabric for which garment.
How Much to Cut the Lining
Most blouses are flat-lined: each lining piece is joined to its outer piece and the pair is sewn as one. A free-hanging lining, sewn separately and joined only at the edges, is used in coats and some kurtis. The allowances are different for each, so decide which one you are making before you cut.
Piece | Flat-lined blouse | Free-hanging lining (kurti, coat) |
|---|
Front and back | Same pattern, same size | Same width; add a 1.00 pleat at centre back in a coat |
Hem | Same as the outer, turned under it | 0.50 to 1.00 shorter than the finished outer hem |
Sleeve | Same pattern, same size | Add 0.50 to the length as a fold at the cuff |
Darts | Marked and sewn through both layers | Sewn in the lining on its own |
Seam allowance | Same as the outer | Same as the outer |
Unwashed lining | Add 3 percent to the length | Add 3 percent to the length |
All measurements are in inches. The last row is only for the day you cannot pre-wash; a soaked lining is always the better choice.
How to Cut the Lining
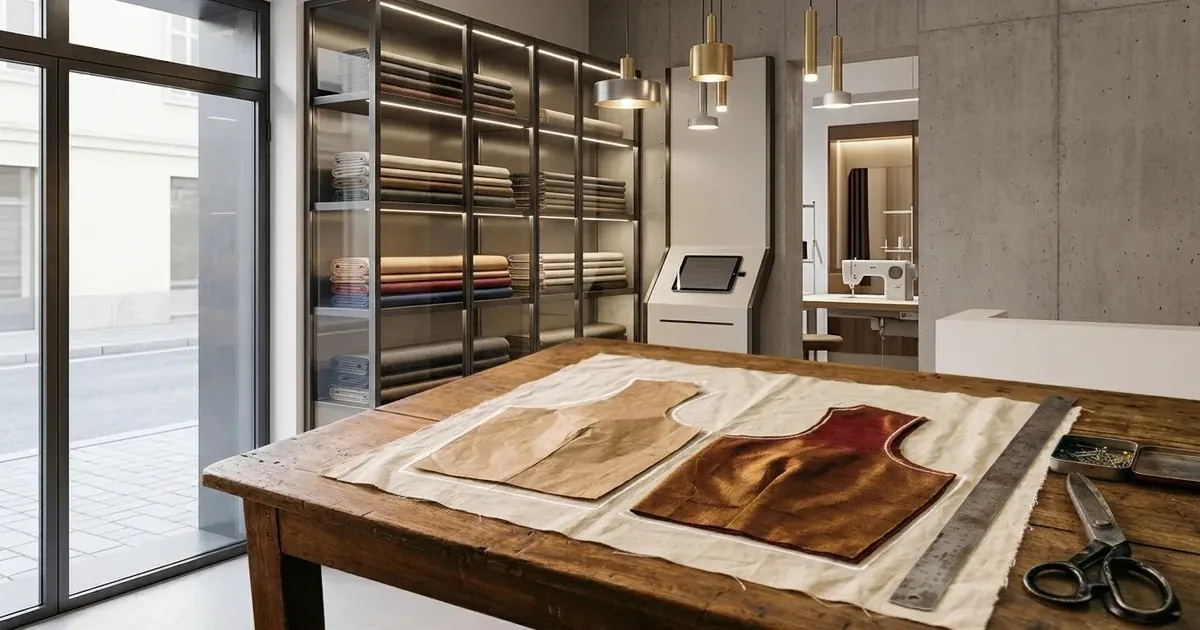
Cream cotton lining cloth on a cutting table with a paper blouse pattern chalked on it and the cut maroon silk front piece beside it
- Soak the lining cloth in plain water for an hour, dry it in the shade and press it while it is still slightly damp. Do this before it comes near the cutting table.
- Square the cloth on the table: pull a thread across the width or tear it, so the cut end runs straight across the grain.
- Lay the same pattern pieces you used for the outer cloth, with the grain line parallel to the selvedge, exactly as on the outer piece.
- Mark every dart, notch and centre line on the lining too. The two layers must match point for point, or the darts will not sit on top of each other.
- For a free-hanging lining, shorten the hem and add the back pleat now, on the cloth, not later on the machine.
- Pin each lining piece to its outer piece as soon as it is cut, so a left front never ends up behind a right front.
Attaching the Lining
For a flat-lined blouse, the aim is two layers that behave as one:
- Lay each outer piece on its lining, wrong sides together, and baste round the edge inside the seam allowance.
- Baste the bust and shoulder area over a curve, such as your hand or a rolled towel, not flat on the table. The outer layer takes a hair more length and will not bubble when worn.
- Sew the darts through both layers together, then treat the pair as one piece for every seam after that.
- Where heavy embroidery needs extra support, the interfacing goes between the outer cloth and the lining, never on top of the lining.
- Finish the neckline and armholes with a facing or a binding, so the lining edge is hidden inside.
- At the hem, turn the outer cloth over the lining edge so no lining can show from the front.
The bust, waist and armhole measurements the lining is cut to are in our blouse cutting measurement chart. Which interfacing to put under embroidery is covered in our interfacing guide for tailors.
Lining in a Kurti and a Coat
- Kurti in cotton: usually unlined, or lined only to the hip where the cloth is thin.
- Kurti in georgette or net: a full lining or a separate slip, cut 1.00 shorter than the kurti so it never shows at the hem.
- Side slits: face the outer cloth and the lining together at the slit, so the lining edge cannot roll out when the customer sits.
- Coat and blazer: always a free-hanging lining, with a pleat at centre back for movement and a fold of extra length at the hem and the cuffs so the lining never pulls when the arm bends.
- Sleeves of a coat: line them in a slippery cloth so the coat slides on over a shirt.
The body and sleeve measurements for a coat lining are the same as the coat itself; see our coat cutting measurement chart.
Blouse Lining in Tailoring CAD
In tailoring CAD the lining is not drafted again. The software copies each outer piece, keeps the same darts, notches and grain line, and applies the lining rules: a shorter hem and a back pleat where they are needed. The outer and the lining are printed together, so the two sets of pieces always match.
Our tailoring CAD software page shows how each piece, lining included, is drafted from one set of measurements.
Questions Tailors Ask
Should a blouse lining be the same size as the blouse?
For a flat-lined blouse, yes. Cut it from the same pattern and baste it on over a curve so the outer layer has a little ease. Only a free-hanging lining is cut shorter at the hem.
Do I need to wash the lining cloth before cutting?
Yes. Cotton lining shrinks in the first wash, and an unwashed lining will pull the blouse in and pucker the hem. Soak it, dry it in the shade and press it before cutting.
Which lining is best for a silk saree blouse?
A soft cotton or cotton-silk lining in a matching or slightly lighter colour. It supports the silk, takes the sweat, and does not add stiffness.
How much lining cloth do I need for a blouse?
About 0.80 metre of 36-inch cloth for a short-sleeve blouse, and about 1.00 metre with full sleeves. Buy a little extra to allow for the shrinkage in the first soak.
Why does the lining show below the hem?
Either it was cut longer than the outer or it was not turned under the outer cloth at the hem. In a free-hanging lining, cut it 0.50 to 1.00 shorter than the finished hem.
Should the sleeves be lined too?
In silk, net and heavy work, yes, for comfort and to carry the weight. In a plain cotton blouse the sleeves are often left unlined to keep them cool.
Line It Once, Line It Right
A lining is never seen, but it decides how a blouse feels, hangs and survives the wash. Soak the cloth, cut it on the same grain from the same pattern, baste it on over a curve, and the two layers will wear as one.
Book a free demo – on-site or online, in your language, with no commitment. Bring a blouse whose lining keeps pulling and we will draft both layers on screen.