A keyhole neck is one of the first things a customer points at in a catalogue. A round neck, a small teardrop opening at the centre, and one button and loop to close it. It looks simple, and then the garment comes back. The opening gapes wide open. The slit splits at the bottom. The loop is so loose that the button slides out, or so tight that the customer cannot get her head through.
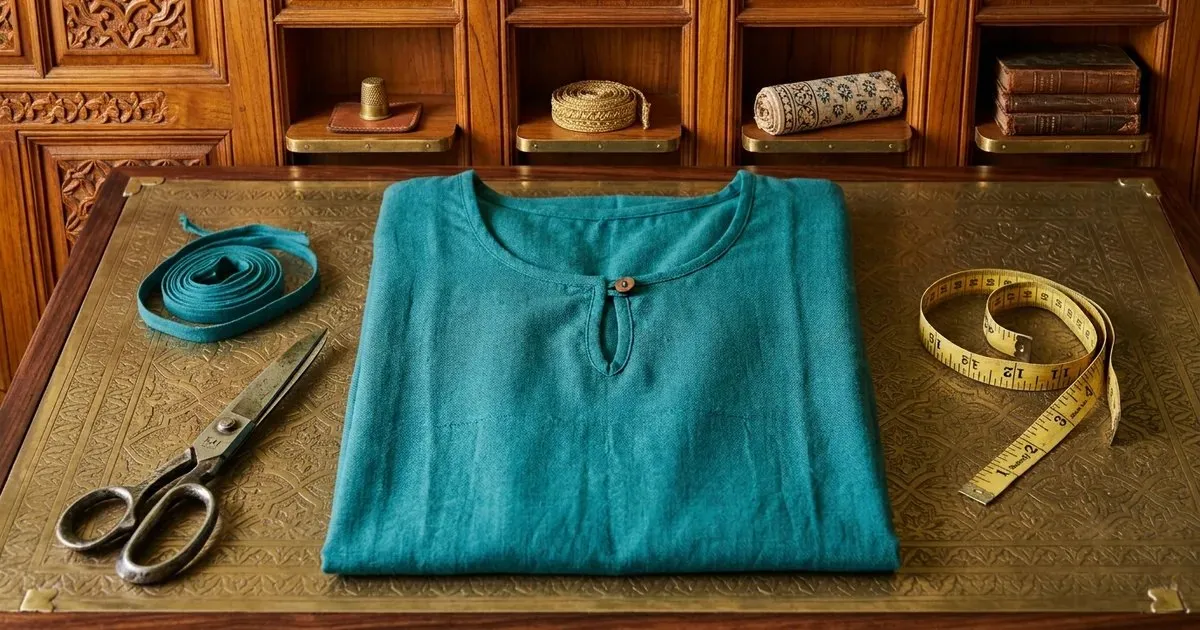
A teal cotton kurti with a round neck and a small keyhole opening closed with one button, laid flat on a brass-topped wooden table beside steel shears, a coil of teal binding and a yellow measuring tape
A keyhole is a cut made in the middle of a garment, in the one place where the cloth carries the most strain. Every time the customer puts the garment on, the opening is pulled apart to pass over her head. If the bottom of the slit is not reinforced, it will tear in the first month.
The length of the slit, the size of the round, and the way the end of the slit is strengthened decide whether a keyhole lasts.
In this guide you will find:
- Why keyhole openings gape, split or pucker
- How long to cut the slit for each garment
- Which edge finish suits which cloth
- How to mark and cut the keyhole
- How to make and place the button loop
- How to repair a keyhole that already splits
Why Keyhole Openings Go Wrong
Four reasons, and all four are decided before the first stitch.
The Slit Was Cut Too Short
The neckline has to open wide enough for the head to pass, which is about 21 to 22 inches round. A closed round neck is often only 15 to 16 inches round. The slit has to make up the difference. If it is too short, the customer pulls the garment over her head and the end of the slit tears.
The End of the Slit Was Not Reinforced
All the strain of putting the garment on is at the very bottom of the slit. A slit finished with nothing more than a binding splits there first. It needs a small patch of interfacing behind it and a row of reinforcing stitches across the end.
The Opening Was Cut Off the Straight Grain
A slit cut on the bias stretches as it is handled. The two sides of the opening move apart, and the keyhole gapes even when it is fastened. Keep the slit on the lengthwise grain, down the centre.
The Loop Does Not Match the Button
A loop cut to the wrong size is the fault the customer notices every day. Too big, and the button slides out and the keyhole hangs open. Too small, and it cannot be fastened without a struggle. The loop is made after the button is chosen, never before.
Keyhole Size for Each Garment
The slit is measured straight down from the finished neck edge at the centre. The round is the width of the teardrop at its widest point. These are working figures in inches for a 36 bust (the frock for a 24 chest); always try the cut piece before finishing.
Garment | Slit length | Round width | Usual fastening |
|---|
Blouse, back keyhole | 3.00 to 4.00 | 1.00 to 1.25 | Button and loop, or dori |
Blouse, front keyhole | 2.50 to 3.00 | 1.00 to 1.25 | Hook and eye, or a loop |
Kurti, front keyhole | 3.50 to 4.50 | 1.25 to 1.50 | Button and loop |
Kurti, back keyhole | 3.00 to 4.00 | 1.25 to 1.50 | Button and loop |
Kids' frock, back keyhole | 3.00 to 3.50 | 0.75 to 1.00 | Button and loop |
Churidar or salwar top | 4.00 to 5.00 | 1.25 to 1.50 | Button and loop, or a tie |
The bust, shoulder and neck figures the opening is cut from are in our blouse cutting measurement chart and our kurti cutting measurement chart.
Which Keyhole Finish for Which Cloth
Finish | Edge width | Best for | Watch for |
|---|
Self-fabric bias binding | Cut 1.25, finishes 0.375 | Cotton, kurtis, kids' wear | Stretching at the round |
Shaped facing | 1.50 all round | Silk and heavier cloth | Clip the round, understitch it |
Piping and facing | Piping 0.125 showing | A contrast edge on silk | Piping is thick at the point |
Lining turned through | None showing | Fully lined silk blouses | Needs a wide seam allowance |
Narrow rolled hem | 0.125 rolled | Georgette, net and chiffon | Needs tiny, even stitches |
Cutting and joining a binding strip, and making the tube for a loop, is covered in our guide to bias binding. The facing widths, understitching and clipping are in our guide to neck facing; the same rules apply round a keyhole.
How to Mark and Cut the Keyhole
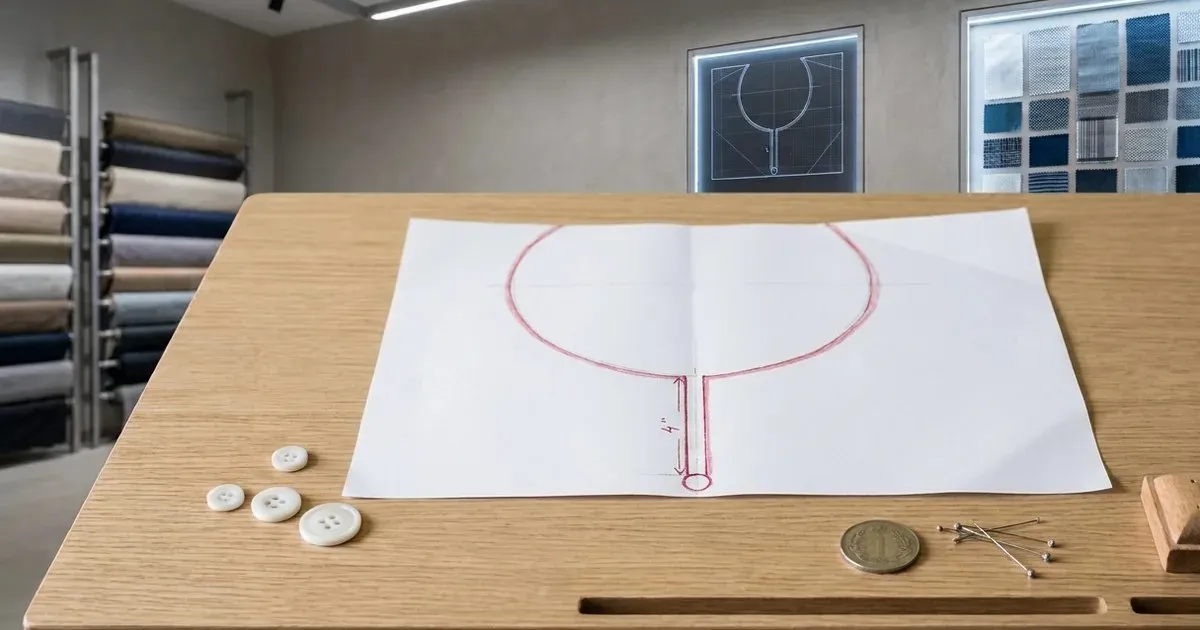
A white paper neck pattern with a round neckline and a 4 inch keyhole slit marked in red pencil, on a light wooden table with white buttons, a coin and steel pins beside it
- Fold the front or back pattern down the centre and draw the neckline as for a round neck.
- Mark the centre line straight down from the neck edge, on the lengthwise grain, for the slit length in the table.
- At the bottom of the slit, draw a small round, 1.00 to 1.50 wide. Use a coin or a small lid as a guide so that the curve is smooth and even.
- Cut a rectangle of interfacing, 2.00 by 3.00, and press it to the wrong side behind the slit and the round before anything else is done.
- Stay-stitch round the whole marked outline, very close to the line, with a short stitch, but do not cut it yet.
- Cut down the centre line to within 0.125 of the end, and clip into the round, and then try the piece before finishing.
Sewing the Loop and the Edge Finish
The loop is caught inside the edge finish, so it is made and basted on first. Choose the button before you begin.
- Choose the button first. Cut a bias strip 1.00 wide and sew it into a narrow tube, about an eighth of an inch finished.
- Make the loop the width of the button plus a quarter inch, so that it slips over easily but does not slide off.
- Fold the loop in half and baste it to the right side of one edge of the neckline, at the point where the opening is to close.
- Sew the loop into the seam allowance, and trim it so that it is not seen once the edge is finished.
- Place the button on the opposite edge, so that the two edges meet and do not overlap.
- Sew the button on with a short thread shank, so that the loop sits flat when it is fastened.
Then finish the edge over it:
- Binding: sew the strip to the right side, fold it over the raw edge and stitch it down from the front, easing it round the round without pulling it.
- Facing: sew the facing to the neckline and the slit, right sides together, with a short stitch round the round.
- Clip the curve at the round right up to the stitching, trim the point, and turn the facing through.
- Understitch the facing, tack it to the shoulder seams by hand, and press it flat.
Repairing a Keyhole That Already Splits
- If the end of the slit has torn, trim the torn edge back to sound cloth and press a patch of interfacing behind it.
- Work a bar tack, or three short stitches across the end of the slit, from the wrong side.
- If the opening gapes when it is fastened, take a small tuck from the two edges at the neck, tapering to nothing at the bottom of the slit.
- If the loop has stretched, take it off and sew a new one of the right size. A loop cannot be shortened.
- Press the finished opening from the wrong side over a rolled towel, without stretching it.
Keyholes in Tailoring CAD
In tailoring CAD the neckline is drafted from the neck and shoulder measurements, and the keyhole is placed at the centre by the slit length and round width you enter. The facing and the interfacing patch are drawn from the same outline, so they always fit the opening they finish.
Our tailoring CAD software page shows how necks, armholes and openings are drafted from one set of measurements.
Questions Tailors Ask
How long should a keyhole slit be?
About 3 to 4 inches on a blouse and 3.5 to 4.5 inches on a kurti. The slit has to be long enough for the neckline to open wide enough to pass over the head.
Why does my keyhole gape when it is fastened?
The slit was cut on the bias, or the edge stretched while it was handled. Cut the slit on the straight grain, stay-stitch it and finish it without pulling.
How do I stop the end of the slit from tearing?
Press a patch of interfacing behind it before cutting, and work a bar tack or a row of reinforcing stitches across the end of the slit.
How big should the round at the bottom be?
About 1 to 1.5 inches wide. A smaller round puckers when it is turned, and a larger one weakens the cloth around it.
Can I use a hook instead of a button and loop?
Yes. A hook and eye is neat on a blouse. A button and loop suits a kurti better, as it is softer and does not catch on the cloth.
Can I add a keyhole to a finished neck?
Not neatly. The edge finish, the interfacing and the loop are all sewn together at the cutting stage. Cut a keyhole into a finished neck and the raw edges will fray.
Reinforce, Bind, Fasten
A keyhole is the most strained opening on a garment. Cut the slit on the straight grain, reinforce the end, finish the edge with a binding or a facing chosen for the cloth, and make the loop to fit the button, and the keyhole will keep its shape.
Book a free demo – on-site or online, in your language, with no commitment. Bring a kurti that gapes at the neck and we will draft the opening on screen.