A one-piece dress is the garment customers bring a photograph for more than any other, and the photograph never shows the two things that decide whether it can be made: where the waist seam sits and how the customer is going to get into it.
Both of those are settled before any cloth is cut, and both are invisible in the picture she is holding. A dress that fits perfectly in every measurement and has no opening is a dress that cannot be worn, and a waist seam an inch off looks wrong to someone who cannot say why.
This is the full measurement list for a one-piece, the three constructions and when each is right, how much hem sweep each silhouette needs to walk in, the cloth each length takes, and the four mistakes that cause most re-cutting.
Three Constructions, One Garment
All three look similar hanging on a rail. They are drafted differently and they suit different figures and different fabrics, so settle which one before taking measurements.
Waist-Seam Dress
A fitted bodice joined to a skirt at a horizontal seam. The most forgiving of the three, because the bodice and the skirt are fitted separately, and the easiest to alter later. The seam position is the whole design.
Princess-Seam Dress
Shaped from shoulder or armhole to hem in continuous panels, with no horizontal join. It follows the body closely and needs accurate bust, waist and hip figures, because the shaping is in the seams and there is nowhere to hide an error.
Shift or A-Line
Straight or gently flared from the shoulders with no waist shaping at all. It needs the fewest measurements and the most judgement, because with nothing fitted the whole garment hangs from the shoulders and the armholes.
If the customer wants the Indian flared version with a kali skirt instead, that is an Anarkali and the flare is built differently - the kali arithmetic is in the lehenga cutting guide.
The 14 Measurements Every One-Piece Needs
Take the round measurements over the undergarments she will wear with the dress, especially the bust. Ease is what you add to the body measurement before drafting.
# | Measurement | Where it is taken | Typical ease |
|---|
1 | Shoulder width | Shoulder point to shoulder point across the back | Nil |
2 | Upper bust | Round the body above the bust, under the arms | 1 to 2 inches |
3 | Bust (full) | Round the fullest part of the bust | 2 to 3 inches |
4 | Under bust | Round the body directly under the bust | 1 to 1.5 inches |
5 | Waist | Round the natural waist, the narrowest point | 1 to 2 inches |
6 | Hip | Round the fullest part of the seat | 2 to 3 inches |
7 | Waist to hip | Straight down from the waist to the fullest hip point | Nil |
8 | Shoulder to bust point | Shoulder point down the front to the fullest point of the bust | Nil |
9 | Shoulder to waist seam | Shoulder point down the front, over the bust, to where the seam will sit | Nil |
10 | Back length to waist | Nape of the neck down the back to the natural waist | Nil |
11 | Full length | Shoulder point to the hem, in the footwear she will wear | Nil |
12 | Armhole round | Round the arm through the armpit and over the shoulder point | 1.5 to 2 inches |
13 | Sleeve length and round | Shoulder point to the sleeve end; round the fullest upper arm | 1.5 to 2 inches |
14 | Hem sweep | Finished circumference at the hem, set by the silhouette | By style |
Measurements 9 and 10 are both taken and they are never equal. The front travels further than the back over the same vertical distance because it passes over the bust, and a bodice cut to the back figure rides up at the centre front and drags the neckline backwards.
Where the Waist Seam Sits Is the Design
On a waist-seam dress this one measurement changes the garment more than any other. There are three normal positions and the customer's photograph usually shows one of them without her knowing the name.
An empire seam sits one to two inches below the bust. It hides the waist completely, so the waist measurement is needed only for the lining, and it suits a customer who wants the dress to skim rather than fit.
A natural waist seam sits at the narrowest point. It gives the defined shape most customers mean when they show a fitted photograph, and it is the least forgiving: the seam sits exactly where any error in the waist figure shows.
A drop waist sits two to three inches below the natural waist. The hip measurement now matters much more, because the seam has to pass over the top of the hip rather than above it.
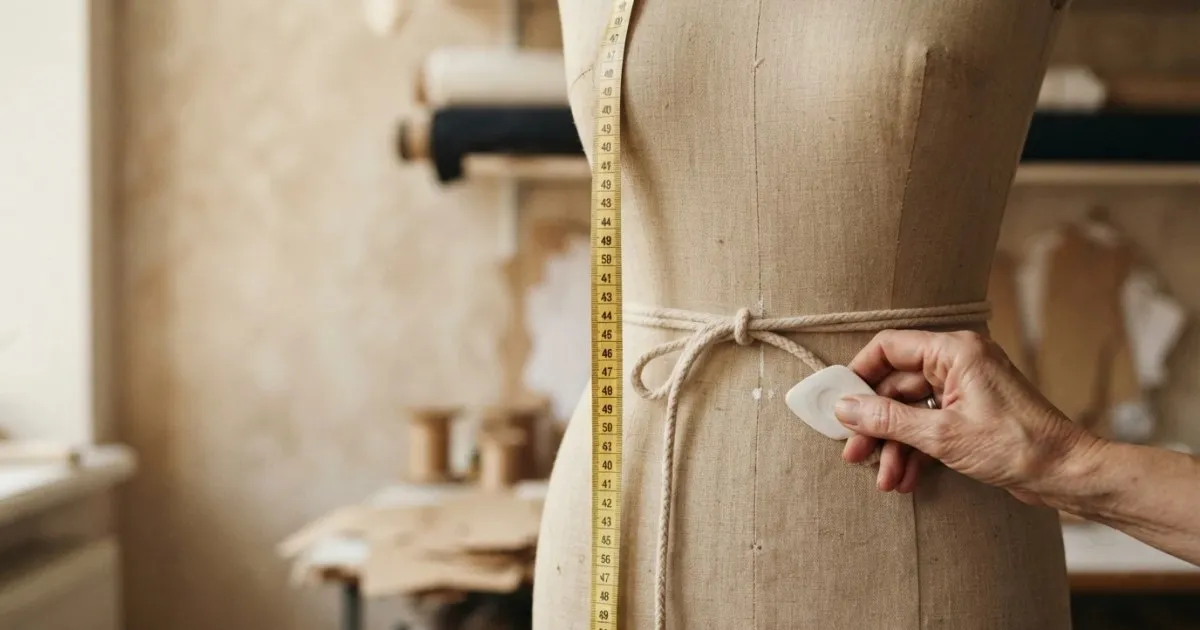
Take measurement 9 down the front to the position she actually wants, not to the natural waist by habit. Mark it on her with a pin or a cord and let her look in the mirror before you write the number down.
How Much Hem Sweep a Dress Needs to Walk In
A dress that cannot be walked in comes back, and the customer will describe it as tight even though the problem is at the hem and not the hip. The longer the dress, the more sweep it needs, because the stride has to fit inside the hem.
Silhouette | Length | Minimum hem sweep | Notes |
|---|
Straight, above knee | Above knee | Hip plus 4 inches | The knee still clears the hem |
Straight, knee length | To the knee | Hip plus 6 to 8 inches | Below this a slit or a vent is needed |
Straight, midi or maxi | Calf to ankle | Add a slit or a vent | No sweep alone makes a straight maxi walkable |
A-line, midi | Calf | 60 to 75 inches | The usual comfortable everyday dress |
A-line, maxi | Ankle | 80 to 100 inches | Flares enough to walk and to sit |
Full circle, maxi | Ankle | 140 inches and above | Needs a light fabric and far more cloth |
A slit is a fitting decision as much as a style one. On a straight maxi it is not decoration, it is the only thing making the garment wearable, and its height comes from the customer's stride rather than from the photograph.
The Opening Decides the Draft
This is the part nobody plans and everybody discovers late. A fitted dress has to pass over the body to be put on, and the narrowest part of the finished garment has to be wider than the widest part it must pass.
If the dress is to go over the head, the finished bust and the finished hip both have to clear the shoulders, which on most adults means the dress has to be looser than a fitted photograph or the neckline has to be wide. If it is to step into, the hem and the hip have to clear the shoulders on the way up instead.
If it is genuinely fitted at both bust and waist, it needs a zip or a placket, and where that goes has to be decided before the pieces are cut. A centre back zip needs a centre back seam; a dress cut on the fold at the centre back cannot have one added later without cutting the panel.
An elastic or a tie at the waist is the third answer. It lets a dress be fitted at the waist and still pull on, which is why so many ready-made maxis are made that way, and it removes the zip entirely.
Cloth Needed for a One-Piece
Typical figures on 44 inch plain cloth, including sleeves, for an average adult. A one-way print or a border stops the pieces nesting and adds roughly half a metre to each.
Version | Fabric width | Typical cloth needed |
|---|
Knee length, short sleeve | 44 inch | 2 metres |
Knee length, full sleeve | 44 inch | 2.5 metres |
A-line midi | 44 inch | 2.75 metres |
A-line maxi | 44 inch | 3.5 metres |
Full circle maxi | 44 inch | 5 to 5.5 metres |
Add lining for anything sheer, usually the same quantity for the bodice and the skirt panels. The figures for the other garments in an order are in the fabric consumption chart.
The Four Mistakes That Cause Most Re-Cutting
1. The Waist Seam Was Placed by Habit
Measured to the natural waist because that is where a waist is, when the customer's photograph showed an empire line. Mark the position on her with a cord, let her see it, then measure to it down the front.
2. No Opening Was Planned
The dress was cut fitted at the bust and the waist with no zip, no placket and no elastic, and it will not pass the shoulders. Decide the opening at the same time as the silhouette, because a centre back zip needs a centre back seam that has to exist before cutting.
3. The Hem Was Too Narrow to Walk In
A straight midi or maxi with no slit restricts the stride, and the customer will say it is tight at the hips. Give it the sweep in the table or give it a slit, and take the slit height from her stride.
4. The Lining Was Cut Exactly Like the Bodice
A lining cut to the same size as the outer bodice has no room to move and strains at the back every time she raises her arms, which shows as pulling on the outside. Cut the lining with a small pleat at the centre back, or a quarter inch of extra width through the back.
The Pieces a One-Piece Produces
A waist-seam dress produces a front bodice, a back bodice, a front skirt, a back skirt, sleeves, a neck facing and a bodice lining. The skirt pieces are wider than the bodice at the join and the fullness is taken in with gathers, pleats or a shaped seam.
A princess-seam dress replaces the bodice and skirt with four or six panels running the whole length. It uses more seams and less cloth than a gathered dress, and it is the version worth drafting on a stored block, because those panel curves are slow to redraw by hand.
The neck facing is the small piece that decides how finished the dress looks. Cut it from the same pattern as the neckline rather than from a strip, interface it, and it holds the neck shape instead of stretching over the first few wearings.
The bodice itself is the blouse block with different ease and length, and the measurement logic is the same as in the blouse cutting measurement chart.
What Changes When the Dress Is Drafted on a Computer
Everything above is the same whether you draft with chalk or with software. The waist seam position and the panel curves are what change.
Empire, natural waist and drop waist are one dress with one setting moved, rather than three drafts. So is the skirt: the same bodice takes a gathered skirt, an A-line or a circle without redrawing the top half.
Princess panels are curves that have to match along their whole length, and a curve that is a few millimetres out shows as a pucker down the front of a fitted dress. A computer keeps the matched lengths equal automatically.
A circle or near-circle skirt is also where cloth is won and lost, and pattern making software nests the panels to your width and prints or cuts the marker at full size.
Settle the Seam and the Opening Before the Scissors
A one-piece is not a difficult garment to cut. It is a difficult garment to agree on, because the customer is describing a photograph and the two decisions that matter are not visible in it.
Take the fourteen measurements, mark the waist seam on her with a cord and measure to it down the front, decide the opening before anything is cut, and check the hem sweep against the table rather than against the picture. Then the stitching is straightforward, which is how it should be.
If one does come back, the fault is usually traceable to one of those two decisions - the garment alteration guide works backwards from the symptom.
Frequently Asked Questions
How many measurements are needed for a one-piece dress?
Fourteen: shoulder, upper bust, full bust, under bust, waist, hip, waist to hip, shoulder to bust point, shoulder to waist seam, back length to waist, full length, armhole, sleeve length and round, and hem sweep.
Where should the waist seam of a dress sit?
One to two inches below the bust for an empire line, at the narrowest point for a natural waist, or two to three inches below that for a drop waist. Mark it on the customer with a cord and measure to it down the front, not down the back.
How wide should the hem of a maxi dress be?
Eighty to a hundred inches for an A-line maxi. A straight maxi cannot be made walkable by sweep alone and needs a slit or a vent, with the height taken from the customer's stride.
Does a fitted dress always need a zip?
Only if it is fitted at both the bust and the waist. A dress that goes over the head must be loose enough, or have a wide enough neckline, to clear the shoulders. An elastic or tied waist is the third option and removes the zip entirely.
How much cloth does a maxi dress need?
About 3.5 metres on 44 inch cloth for an A-line maxi and 5 to 5.5 metres for a full circle. Add lining for sheer fabric and roughly half a metre more for a one-way print or a border.
Cut Dresses With Fashion Dot CAD
Fashion Dot CAD drafts waist-seam, princess-seam and A-line dresses from the measurements on your sheet, moves the waist seam between empire, natural and drop without a redraft, keeps princess panels matched along their length, and nests the skirt to the width of the cloth you actually have. See what it costs on the tailoring CAD software price page.
See a Dress Drafted From Your Own Measurements
Bring one customer's measurements and the photograph she showed you to a free demo. We will draft the dress live, print the pattern full size and show you the marker on your own fabric width. Book a free demo at a time that suits your shop.