Most tailoring shops are not designed. They grow one machine, one shelf and one table at a time, until the counter, the cutting table and the machines are all in each other’s way. This guide shows how to arrange a shop in the order the work actually moves, how much space each area needs, what slows work down without anyone noticing, and how to plan room for a plotter, projector or laser before you buy one.
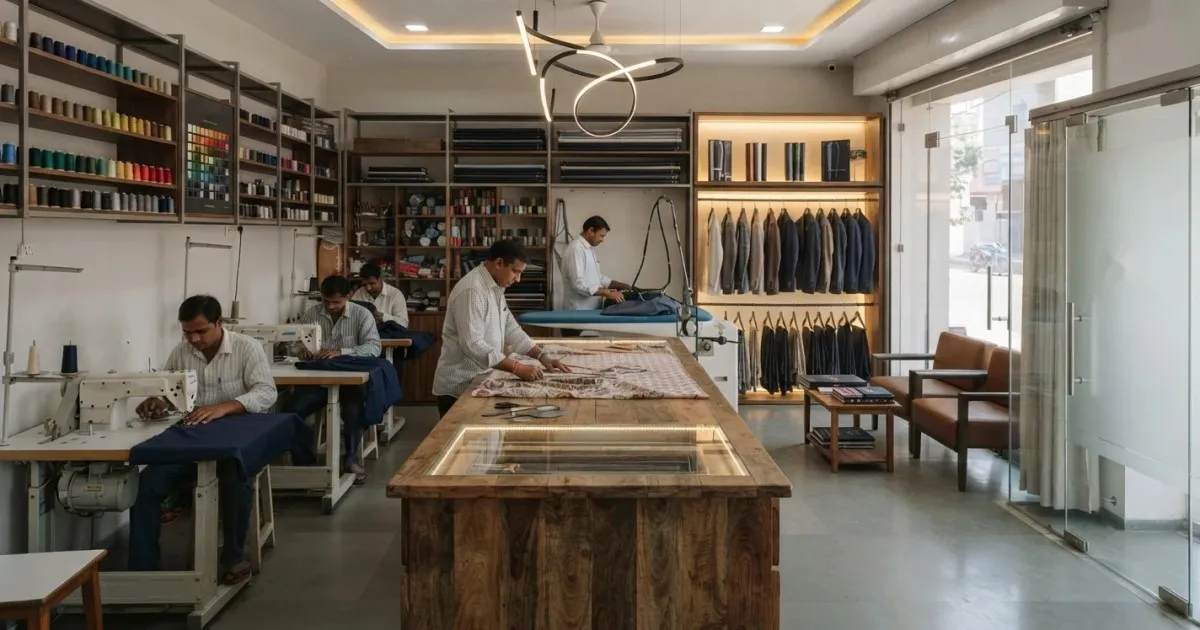
A tailoring shop arranged in work order, with machines, cutting table, pressing area, ready rack and a waiting area by the entrance
Watch one garment travel through an ordinary shop. The customer is measured at the counter, the fabric is carried to the back for cutting, the pieces come forward to the machines, go back for pressing, and return to the front for delivery. Every trip crosses someone else’s path.
Nobody notices a few extra steps. Multiply them by every garment, every day, and the shop is losing an hour or more to walking, waiting and searching – time that could have been cutting.
A good layout does not need a bigger shop. It needs the same shop arranged in the order the work goes.
In this guide you will find:
Why most shops end up badly arranged
The six zones of a tailoring shop, in work order
How much space and furniture each zone needs
The light, power and storage details that slow work down
How the layout changes for a boutique, a small shop and a production unit
How to plan space for a plotter, projector or laser
Why Most Shops End Up Badly Arranged
Four reasons, and none of them are about the size of the shop.
Machines Were Added Wherever There Was a Plug
The first machine went by the window, the second went where the socket was, and the third went wherever was left. The shop is arranged around the wiring, not the work.
The Cutting Table Is Also the Storage Table
Fabric, finished garments, bills and lunch boxes all land on the biggest flat surface in the shop. Before every cut, someone has to clear it.
Customers Walk Through the Workroom
When the trial area is at the back, every customer walks past the machines and the cutting table. Work stops, conversations start, and the shop looks less professional than it is.
Finished and Unfinished Work Share the Same Space
When ready garments, pieces waiting for stitching and orders waiting for alteration sit on the same shelf, things go missing, and the wrong garment gets handed over.
Follow the Garment: Six Zones in Work Order
Arrange the shop so a garment moves forward through it, from the front to the back and out again, without crossing itself:
Counter – orders, measurements, design discussion, payments and delivery.
Trial area – a curtained space near the counter, so customers never enter the workroom.
Cutting table – with fabric storage underneath and patterns within reach.
Stitching – machines in a row or an L-shape, close to the cutting table.
Finishing and pressing – hooks, hems, buttons and ironing, between the machines and the front.
Ready rack – finished garments in covers, labelled by order number, beside the counter.
If a garment ever has to go backwards – from pressing back to cutting, or from the counter back to the machines – that is where the layout needs work.
Space and Furniture for Each Zone
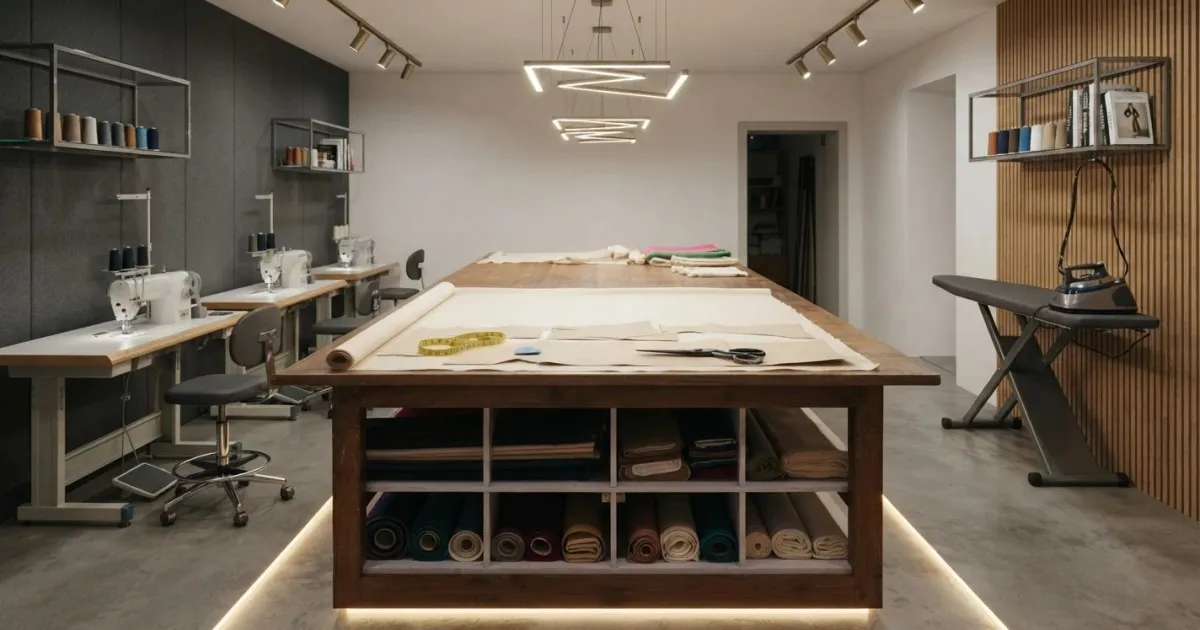
Cutting table with overhead lighting and fabric storage underneath, with space to walk around all sides
Exact sizes depend on your shop and garments. These are starting points that work for most shops:
Zone | What it needs | Common mistake |
|---|
Counter | Space for the order book or tablet, measuring tape and a small display | Too deep, so the customer stands far from the person measuring |
Trial area | A full-length mirror, a hook, a stool and good light | Placed at the back, so customers walk through the workroom |
Cutting table | Room to walk around at least three sides; height near the cutter’s waist | Pushed against a wall, so long lays cannot be handled |
Stitching | Each machine with its own light, socket and space for a bundle of pieces | Machines facing a wall with no space for the work beside them |
Pressing | A steady table, a hanging rail and a socket that can take the iron’s load | Sharing a socket with machines, tripping the power |
Ready rack | Garments on hangers in covers, sorted by order number or date | Mixed with unfinished work, so the wrong garment is handed over |
The cutting table matters most. It is where every order starts, and a table that is too small, too low or too crowded slows down everything after it.
Light, Power and Storage
These details rarely appear on a plan but cost time every day:
Light the cutting table evenly from above. Shadows from a single bulb make chalk lines hard to see.
Give each machine its own light. Window light changes through the day; the work should not.
Keep machine power and pressing power on separate points where possible, so one iron does not stop the shop.
Store fabric under the cutting table, rolled or folded by customer and order number.
Keep thread, hooks and buttons on open shelves at the machines, not in a cupboard across the room.
Keep one shelf only for work waiting on a decision – fabric not yet approved, orders on hold.
Boutique, Small Shop or Production Unit
The same zones apply everywhere. What changes is how much of the shop each one takes:
| Boutique | Small tailoring shop | Production unit |
|---|
Front of shop | Large – display, counter, trial room and seating | Counter and a small trial area | A small office for orders |
Cutting | One table, often visible to customers | One table near the machines | Long tables for bulk lays |
Stitching | A few machines, often behind a partition | Machines along one or two walls | Rows of machines in sequence |
Finishing | Combined with pressing | A small pressing table | Separate finishing and packing lines |
Main priority | Customer experience | Making the best use of a small space | Flow of bulk work |
If the shop is growing from one person to a team, our guide to growing from solo tailor to team covers what changes before the layout does.
Planning Space for a Plotter, Projector or Laser
Many shops buy a cutting machine first and look for space afterwards. Plan it the other way round:
A pattern printer or plotter needs a clear place for paper to feed in and come out, close to the cutting table.
A projector is mounted above the cutting table, so the table has to stay clear and the ceiling has to allow the fixing.
A laser cutter needs its own floor space, steady power and proper ventilation – check the exact requirements for the model before deciding where it goes.
Whatever you choose, keep the path from the machine to the stitching area short and clear.
The differences between a printer, plotter, projector and laser are explained in our guide to pattern cutting machines. If you are considering a laser, see the laser cutting machine for tailoring page and ask for the exact space it needs.
Questions Tailors Ask
How should a small tailoring shop be arranged?
In the order the work moves: counter and trial area at the front, cutting table next, machines close to it, pressing and the ready rack back towards the counter. Even a small room can follow this order.
How big should a tailoring cutting table be?
Big enough for the longest piece you cut regularly, with room to walk around at least three sides. Height matters as much as size – a table near the cutter’s waist height saves backs as well as time.
Where should the trial room be?
Near the counter, so customers never walk through the workroom. A curtain, a full-length mirror, a hook and good light are enough.
How should sewing machines be arranged?
In a row or an L-shape close to the cutting table, each with its own light, socket and space beside it for the pieces being stitched.
How do I find space for a cutting machine in a small shop?
Decide where it goes before you buy it. A projector uses no floor space at all; printers and plotters need a feed area near the cutting table; a laser needs its own space with power and ventilation.
What is the most common layout mistake?
Using the cutting table as storage. Every order starts there, so a cluttered table slows down every garment in the shop.
See How the Work Can Flow
A well-arranged shop saves steps. Faster pattern making saves hours. The quickest way to see both together is to watch a pattern drafted from measurements you brought yourself, and talk through where a cutting machine would fit in your shop.
Book a free demo – on-site or online, in your language, with no commitment.