A waistcoat is the smallest garment in a wedding order and the one most likely to be sent back. It has no sleeves, so nothing covers a badly cut armhole. It has no drape, so nothing hides a wrong length. And it is worn over a shirt, which means every measurement on the sheet is taken over a garment rather than over the body.
Most waistcoat faults are visible in a photograph from ten feet away. The armhole gapes and the shirt shows through it. The front points sit above the belt instead of covering it. The back rides up because the front and the back were cut to the same length.
This is the full measurement list, how to take it over the shirt, where the front points and the buckle actually belong, the cloth each version takes, and the four mistakes that cause most re-cutting.
Three Waistcoats, Three Different Necklines
The block is close to the same. The neckline, the length and what goes under it are what change, and the customer's word for all three is usually just waistcoat.
Suit Waistcoat
The classic V neck, five or six buttons, shaped points at the front hem and a plain back in lining cloth with an adjustable strap. Worn over a formal shirt and under a coat, so it has to be close enough not to bulk under the coat.
Jodhpuri or Nehru Waistcoat
A band collar closing high at the neck, usually five buttons, worn over a kurta rather than a shirt. Because a kurta is fuller than a shirt, the chest is measured over noticeably more cloth and the ease has to allow for it.
Short or Casual Waistcoat
Cut shorter, often with a straight hem rather than points, worn open over a shirt or kurta. Being open most of the time, it is judged entirely on how the armhole and the shoulder sit.
When the waistcoat is part of a three piece order, the coat is drafted from its own sheet - take those measurements from the coat cutting measurement chart.
The 12 Measurements Every Waistcoat Needs
Take every measurement with the customer wearing the shirt or kurta the waistcoat will go over, standing straight with his arms down. Ease is added on top of that, not on top of the bare body.
# | Measurement | Where it is taken | Typical ease |
|---|
1 | Chest | Round the fullest part of the chest, over the shirt | 2 to 3 inches |
2 | Waist | Round the natural waist, over the shirt | 2 to 3 inches |
3 | Seat | Round the hip, only for a longer waistcoat | 2 to 3 inches |
4 | Shoulder width | Shoulder point to shoulder point across the back | Nil, cut narrower |
5 | Across back | Armhole to armhole across the back, at armhole level | Nil |
6 | Across front | Armhole to armhole across the front, at the same level | Nil |
7 | Front length | Side neck point down the front to the lowest front point | Nil |
8 | Back length | Nape of the neck down to the back hem | Nil |
9 | Armhole round | Round the arm through the armpit and over the shoulder point | 1 to 1.5 inches |
10 | Neck depth | Side neck point down to where the V or the collar closes | By design |
11 | Shoulder slope | Drop from the neck point to the shoulder point | Nil |
12 | Button stance | Side neck point down to the top button | By design |
Measure Over the Shirt, Not Over the Body
This is the rule that separates a waistcoat sheet from every other sheet in the shop. A waistcoat is an over-garment. It never touches the body, so a measurement taken on the body is already short by the thickness of whatever goes underneath.
A formal shirt adds roughly half an inch to an inch round the chest once it is tucked and buttoned. A kurta adds two inches or more, and a starched one adds more again. Measure over the actual garment, and if the customer has come in a t-shirt, say so on the sheet rather than guessing the difference later.
The ease in the table above is on top of that. Two to three inches over the shirt measurement is what lets a waistcoat close without straining at the button stance, which is where a tight waistcoat pulls first.
Do not add ease twice. Measuring over a kurta and then adding kurta allowance as well is the most common way to produce a waistcoat that hangs loose and reads as cheap however good the cloth was.
Front Length, Back Length and Where the Points Sit
Measurements 7 and 8 are different numbers and they are never equal. The front of a waistcoat is longer than the back, because the front has to come down over the trouser waistband and the back does not.
The front point should finish about an inch below the top of the trouser waistband, so that when the customer raises his arms no shirt appears between the waistcoat and the trouser. That strip of shirt is the single most noticeable waistcoat fault in a wedding photograph.
The back hem finishes higher, roughly at the natural waist or just below, so it sits flat under a coat. Cut the back as long as the front and it folds and bunches where it meets the trouser seat.
A double-pointed front is measured to the point, not to the centre. Measure to the lowest part of the shape, because that is the part that has to clear the waistband.
The Armhole and the Back Strap
A waistcoat armhole is cut higher and closer than any other armhole in the shop. It carries no sleeve, so there is nothing to fill it, and anything loose gapes and shows the shirt. Give it one to one and a half inches of ease and no more, and cut it a good inch higher than you would cut a coat armhole on the same chest.
Cut the shoulder narrower than the body measurement as well. The waistcoat shoulder is a strap, not a shoulder, and it should sit inside the point of the shoulder rather than reaching it.
The strap and buckle at the back are the only adjustment a waistcoat has, and they belong at the natural waist, level with the narrowest part of the body. Set higher, the strap pulls the back up and creases it; set lower, it drags the back hem down and opens the front.
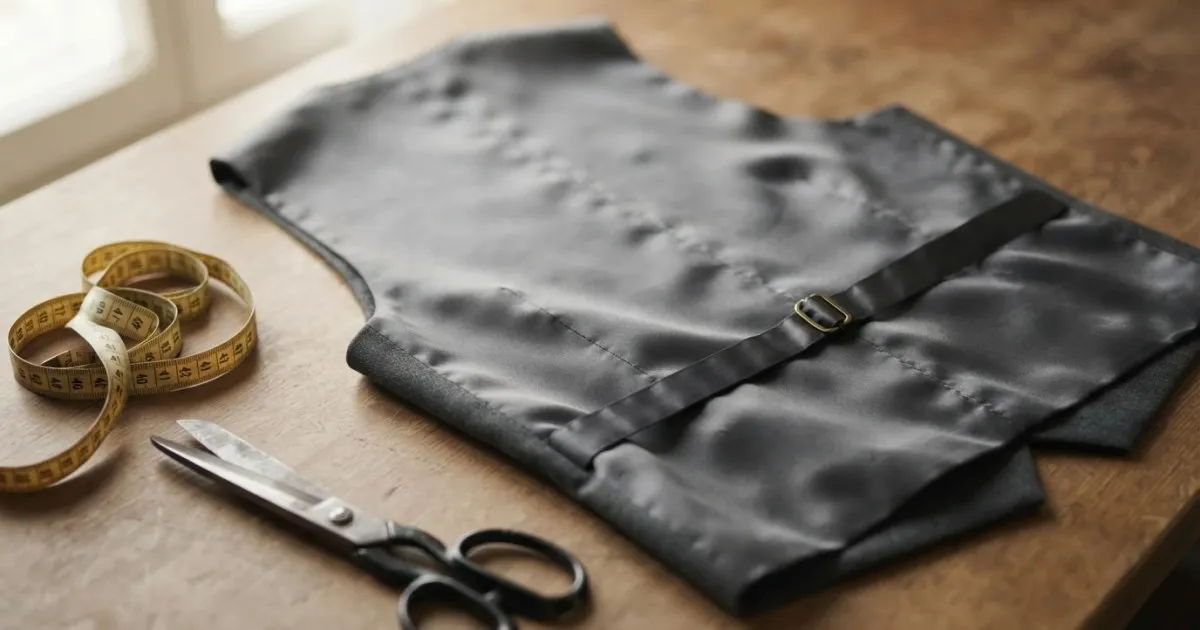
Do not use the strap to make up for a chest measurement that was taken wrong. Tightening a strap on a waistcoat that is too big pulls the back into folds and drags the armholes backwards, and both are visible from the front.
Cloth Needed for a Waistcoat
The front is cut from the suiting and the back is usually cut from lining or a matching satin, which is why a waistcoat takes so little of the main cloth. Figures are for an average adult chest of 38 to 42 inches.
Version | Main cloth (54 to 58 inch suiting) | Lining / back cloth |
|---|
Suit waistcoat, lining back | 0.75 metre | 1 metre |
Waistcoat, self back | 1.25 metres | 1 metre |
Jodhpuri or Nehru waistcoat | 1.25 metres | 1.25 metres |
Short casual waistcoat | 0.75 metre | 0.75 metre |
Add a quarter metre to each figure for a check or a stripe, because the pattern has to match across the button stand and the pockets. On 44 inch cloth add roughly half a metre to the main cloth figure.
The Four Mistakes That Cause Most Re-Cutting
1. The Chest Was Measured on the Body
The customer came in a t-shirt, the chest was taken over it, and the finished waistcoat strains at the buttons over a formal shirt. A waistcoat is measured over the garment it will be worn on top of, every time.
2. The Armhole Was Cut Like a Coat Armhole
A coat armhole is filled by a sleeve. A waistcoat armhole is filled by nothing, so the same depth gapes and shows the shirt at the side. Cut it higher and closer, with no more than an inch and a half of ease.
3. The Front and Back Were Cut the Same Length
The front has to reach past the trouser waistband and the back does not. Cut equal, either the front is short and shows a strip of shirt, or the back is long and bunches over the seat.
4. The Buckle Was Placed by Eye
Set above or below the natural waist, the strap pulls the back out of shape the moment it is tightened, and the front opens. Place it level with the narrowest part of the body, measured, not judged.
The Pieces a Waistcoat Pattern Produces
A full waistcoat draft produces eight pieces: two fronts, two front linings, two backs in lining cloth, a pair of pocket welts and the strap. The fronts are interfaced across the chest and down the button stand so the edge stays straight through years of buttoning.
The front and the back are nothing like each other. The front carries the neckline, the button stand, the pockets and the point; the back is a plain shaped panel, cut in lining on a suit waistcoat and in the main cloth when the customer wants it to look finished with the coat off.
The front lining is cut from the same pattern as the front but a fraction smaller round the edges, so the lining pulls the seam to the inside and no lining shows at the front edge.
The welt pockets and the button stand are constructed the same way as on a coat, and the sherwani cutting measurement chart covers the same detailing on a longer garment.
What Changes When the Waistcoat Is Drafted on a Computer
Everything above is the same whether you draft with chalk or with software. What changes is the neckline and the repeatability.
The V neck, the band collar and the short casual neckline are three variations on one front piece. On CAD they are three settings rather than three drafts, and the button stance recalculates with the neckline instead of being marked again by hand.
For a wedding order the waistcoat, the coat and the trouser all come from one set of measurements, so the same chest figure cannot be right on one garment and wrong on another.
Waistcoat pieces are small and awkward to nest by hand, and on expensive suiting that matters - pattern making software fits them into the width automatically and prints or cuts the marker at full size.
Good Waistcoat Cutting Starts Over the Shirt
A waistcoat has nowhere to hide. No sleeves to cover the armhole, no drape to cover the length, and one strap that can only make it tighter, never better.
Measure over the garment it will be worn on top of, add two to three inches on top of that, cut the armhole high and the shoulder narrow, make the front longer than the back so the point clears the waistband, and set the buckle at the natural waist. Write on the sheet which garment you measured over, because that single line is what makes the next waistcoat for the same customer repeatable.
Frequently Asked Questions
How many measurements are needed for a waistcoat?
Twelve: chest, waist, seat, shoulder width, across back, across front, front length, back length, armhole, neck depth, shoulder slope and button stance. All of them are taken over the shirt or kurta the waistcoat will be worn over.
Why is a waistcoat measured over the shirt?
Because it is an over-garment and never touches the body. A shirt adds roughly half an inch to an inch round the chest and a kurta two inches or more, so a measurement taken on the body is already short before any ease is added.
How much longer should the front be than the back?
The front point should finish about an inch below the top of the trouser waistband so no shirt shows when the arms are raised. The back finishes at or just below the natural waist so it sits flat under a coat.
Why does a waistcoat armhole gape?
Almost always because it was cut to coat depth. A coat armhole is filled by a sleeve and a waistcoat armhole is filled by nothing. Cut it about an inch higher and closer, with no more than an inch and a half of ease.
How much cloth does a waistcoat need?
About 0.75 metre of suiting with a lining back, or 1.25 metres with a self back, on 54 to 58 inch cloth, plus about a metre of lining. A Jodhpuri waistcoat needs about 1.25 metres. Checks and stripes need a quarter metre more.
Cut Waistcoats With Fashion Dot CAD
Fashion Dot CAD drafts suit, Jodhpuri and casual waistcoats from the measurements on your sheet, switches the neckline and recalculates the button stance without a redraft, and shares one set of measurements across the waistcoat, the coat and the trouser of a wedding order. See what it costs on the tailoring CAD software price page.
See a Waistcoat Drafted From Your Own Measurements
Bring one customer's measurements to a free demo and we will draft the waistcoat live, print the pattern full size and show you the marker on your own suiting width. Book a free demo at a time that suits your shop.