Most tailors cut their first ladies shirt off the gents shirt block, because from the front the two garments look like the same thing with the buttons moved. Then it comes back with the placket pulling open between the buttons, a horizontal crease across the bust and the shoulder seam sitting too far back.
None of that is a stitching fault. A gents shirt is drafted for a body that is roughly the same measurement across the front as it is round the chest. A woman's body is not, and the difference has to go somewhere. That somewhere is a dart, and a shirt drafted without one puts the shortfall into the button placket instead.
This is the full measurement list for a ladies shirt or western top, where the dart goes and how deep it should be, how much ease each fit needs, the cloth each version takes, and the four mistakes that cause most re-cutting.
Three Fits, One Block
The block is the same. What changes is the ease you add to it, and the customer's word for what she wants is not reliable, so describe the fit back to her before cutting.
Fitted
Shaped with a bust dart and waist darts or princess seams, following the body through the waist. It needs accurate bust, waist and hip figures because there is nowhere for an error to hide.
Semi-Fitted
Shaped at the bust but only lightly at the waist. This is the usual office shirt, and the one most customers mean when they say they want it fitted but comfortable.
Relaxed or Boxy
Straight from the chest down, with the fullness carried through the body. It still needs a bust dart or a shoulder yoke, because the shortfall across the front exists whether or not the waist is shaped.
If the customer wants the Indian version instead, that is a kurti and it is drafted differently through the length and the side slit - take those measurements from the kurti cutting measurement chart.
The 13 Measurements Every Ladies Shirt Needs
Take the round measurements over the undergarments she will wear with the shirt, especially the bust. Ease is what you add to the body measurement before drafting, and it is what separates the three fits above.
# | Measurement | Where it is taken | Typical ease |
|---|
1 | Shoulder width | Shoulder point to shoulder point across the back | Nil |
2 | Bust (full) | Round the fullest part of the bust, tape level at the back | 2 to 4 inches |
3 | Upper bust | Round the body above the bust, under the arms | 1 to 2 inches |
4 | Under bust | Round the body directly under the bust | 1 to 2 inches |
5 | Waist | Round the natural waist, the narrowest point | 2 to 4 inches |
6 | Hip | Round the fullest part of the seat | 3 to 4 inches |
7 | Front width | Across the front, armhole to armhole, about 5 inches below the neck | Nil |
8 | Back width | Across the back, armhole to armhole, at the same level | Nil |
9 | Shoulder to bust point | Shoulder point down the front to the fullest point of the bust | Nil |
10 | Shirt length | Shoulder point down the front to where the hem will sit | Nil |
11 | Armhole round | Round the arm through the armpit and over the shoulder point | 1.5 to 2 inches |
12 | Sleeve length | Shoulder point to where the sleeve will end | Nil |
13 | Sleeve round | Round the fullest part of the upper arm | 1.5 to 2 inches |
Upper Bust and Full Bust: The Pair That Sets the Dart
Measurements 2 and 3 are the reason this sheet exists. The difference between them is the amount of cloth the body needs across the front that it does not need round the back, and that difference is exactly what the dart takes up.
Draft the shoulders, the neck and the armhole from the upper bust, not from the full bust. That is the part of the body the top of the shirt actually sits on. Then add the difference back in as a dart below the armhole.
As a working rule, every inch of difference between upper bust and full bust is about an inch of dart intake, split between a bust dart and a waist dart on a fitted shirt. A two inch difference is a single side dart. Four inches or more is usually better carried as a princess seam, because a single dart that deep puckers at the point.
This is what goes wrong when a gents block is used. There is no upper bust measurement on it, so the whole garment is drafted from the full bust, the shoulders come out too wide, the armhole drops and the placket still gapes because the extra width went round the body instead of across the front.
Where the Dart Points, and How Far It Stops Short
A bust dart points at the fullest point of the bust and stops short of it. How short is the difference between a shirt that fits and a shirt with a cone at the front.
Stop a side bust dart about one inch short of the bust point on a small cup, and up to an inch and a half on a fuller one. The dart shapes the cloth toward the point; it must not arrive there.
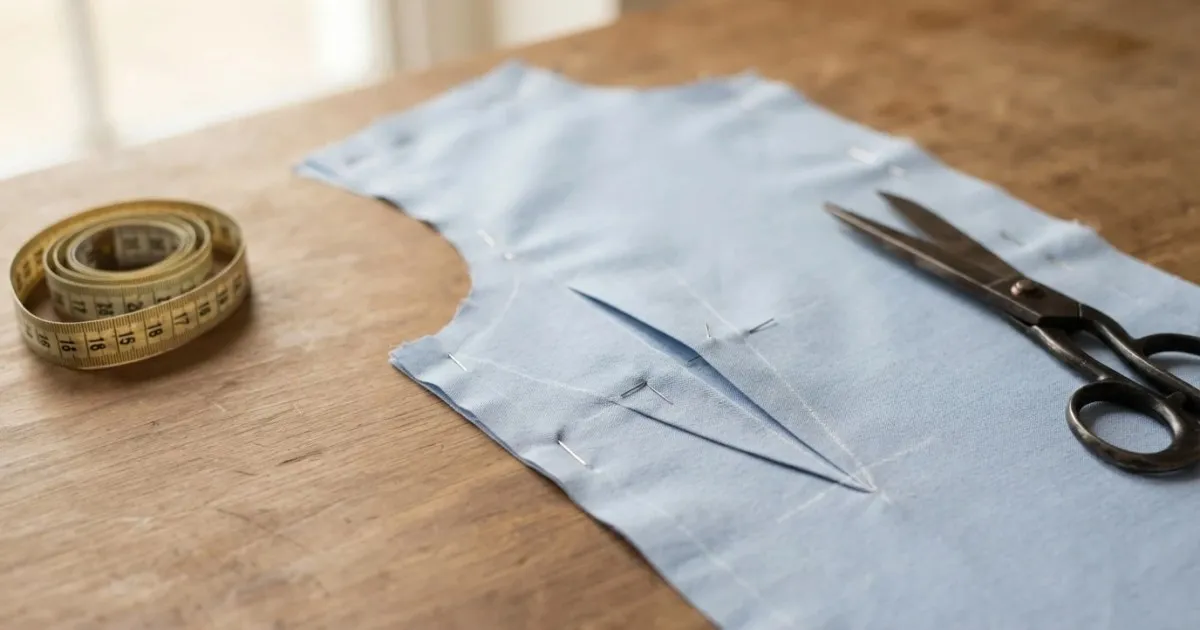
Measurement 9, shoulder to bust point, is what places it vertically. Copying a dart position from a previous customer of the same bust size is the most common way to get a dart that sits an inch high, and an inch is enough to see.
On a relaxed or boxy shirt the dart can be moved into the armhole or the shoulder seam instead of the side, where it disappears into the seam. It is still there. A boxy shirt without one hangs forward off the bust and shows the same drag lines as a fitted one.
Ease by Fit
The same measurements produce three different shirts depending on the ease. Write the fit on the sheet in words, not just the numbers, so the next order can be repeated.
Fit | Bust ease | Waist ease | Hip ease | Shaping |
|---|
Fitted | 2 to 2.5 inches | 2 inches | 3 inches | Bust dart plus waist darts or princess seams |
Semi-fitted | 3 inches | 3 to 4 inches | 3.5 inches | Bust dart, light waist shaping |
Relaxed / boxy | 4 inches or more | Straight from bust | Straight from bust | Dart moved to armhole or shoulder |
A stiff cotton needs the upper figure in each column and a soft rayon or viscose the lower one. The same three inches of bust ease reads as comfortable in a drapey fabric and as loose in a crisp poplin.
Cloth Needed for a Ladies Shirt
Typical single-garment figures for an average adult size, on plain cloth with no border and no one-way print. A check or a stripe has to be matched at the placket, the yoke and the pockets, which is where the extra goes.
Version | Fabric width | Typical cloth needed |
|---|
Short sleeve, hip length | 44 inch | 1.5 metres |
Full sleeve, hip length | 44 inch | 2 metres |
Full sleeve, tunic length | 44 inch | 2.25 metres |
Full sleeve, hip length | 36 inch | 2.5 metres |
Checked or striped, full sleeve | 44 inch | 2.25 to 2.5 metres |
The Four Mistakes That Cause Most Re-Cutting
1. The Gents Block Was Used As It Is
No upper bust measurement, so everything was drafted from the full bust. The shoulders are wide, the armhole is low and the placket gapes. Draft the top of the shirt from the upper bust and put the difference into a dart.
2. The Dart Was Aimed at the Bust Point Instead of Toward It
The dart runs all the way to the fullest point and finishes in a visible cone. Stop it one to one and a half inches short, depending on the cup.
3. The Button Was Not Placed at the Bust Point
A placket gapes between buttons, and the gap always appears at the fullest point. Place one button exactly at the bust point and space the rest from it, rather than spacing evenly from the collar down.
4. The Length Was Taken Down the Back
A ladies shirt front travels further than the back over the same vertical distance because it goes over the bust. Measured down the back, the finished shirt sits short at the centre front and rides up. Measure the length down the front.
The Pieces a Ladies Shirt Pattern Produces
A full shirt draft produces nine pieces: the front and back bodice, a back yoke, two sleeves, two cuffs, a collar and a collar stand. The button stand may be cut on or as a separate placket strip.
The front and back are never mirror images. The front carries the bust dart and the button stand and is cut longer to the hem; the back carries the yoke and, on a fitted shirt, a small amount of shaping at the waist.
The collar stand is the piece most often cut carelessly and the one the customer looks at first. It has to match the finished neck measurement exactly, not the drafted one, because the neckline stretches slightly as it is sewn.
The collar, cuff and yoke construction is the same as on a gents shirt, and the gents shirt cutting measurement chart covers those pieces in detail.
What Changes When the Shirt Is Drafted on a Computer
Everything above is the same whether you draft with chalk or with software. The dart arithmetic and the repeatability are what change.
Dart intake, dart position and dart length all follow from the upper bust, the full bust and the shoulder to bust point measurement. On CAD that is a calculation rather than a judgement, and moving the dart from the side seam to the armhole or into a princess seam is a rotation rather than a redraft.
The three fits become one set of ease settings on one block, so the same customer's fitted shirt and boxy shirt come from the same measurements without drafting twice.
For bulk work this is where the time goes, because a size set has to be graded and marked rather than drafted one by one - pattern making software grades the set and nests the marker to the cloth width automatically.
If the order is a uniform run rather than a single shirt, the costing side is covered in the guide to uniform stitching bulk orders.
Good Shirt Cutting Starts With Two Bust Measurements
A ladies shirt is a gents shirt plus one idea: the front of the body needs cloth the back does not, and that difference has to be taken up deliberately. Take it up in a dart and the shirt fits. Ignore it and the placket takes it up for you, badly, every time she moves.
Take the thirteen measurements, take the upper bust as well as the full bust, draft the top of the shirt from the upper bust, place the dart from the shoulder to bust point figure, and put one button at the bust point. Write the fit on the sheet in words so the next shirt can be repeated without guessing.
Frequently Asked Questions
How many measurements are needed for a ladies shirt?
Thirteen: shoulder, full bust, upper bust, under bust, waist, hip, front width, back width, shoulder to bust point, shirt length, armhole, sleeve length and sleeve round. The upper bust and the shoulder to bust point are the two a gents shirt sheet does not have.
Why does a ladies shirt need a bust dart?
Because the body needs more cloth across the front than round the back, and a shirt drafted without a dart has nowhere to put that difference. It ends up in the button placket, which is why the placket gapes at the bust.
How deep should the bust dart be?
Roughly one inch of dart intake for every inch of difference between the upper bust and the full bust. Below about two inches of difference a single side dart is enough. Above about four inches, use a princess seam, because a dart that deep puckers at the point.
Where should the dart stop?
About one inch short of the fullest point of the bust on a small cup and up to an inch and a half on a fuller one. A dart taken all the way to the point finishes in a visible cone.
How much cloth does a ladies shirt need?
About 1.5 metres on 44 inch cloth for a short sleeve hip length shirt, 2 metres for full sleeve, and 2.25 metres at tunic length. Checks and stripes need a quarter to half a metre more for matching.
Cut Shirts With Fashion Dot CAD
Fashion Dot CAD drafts ladies shirts and tops from the measurements on your sheet, works the dart intake and position out from the upper bust and full bust figures, and rotates the dart into the armhole, the shoulder or a princess seam without a redraft. Size sets grade automatically for bulk orders. See what it costs on the tailoring CAD software price page.
See a Shirt Drafted From Your Own Measurements
Bring one customer's measurements to a free demo and we will draft the shirt live, place the dart from her own bust point, print the pattern full size and show you the marker on your own fabric width. Book a free demo at a time that suits your shop.