Every measurement chart tells you what to measure. Almost none of them tell you how to hold the tape, and that is where most of the error comes from. Two tailors can take the same twelve measurements on the same customer and come out an inch apart on four of them.
An inch is not a small amount. An inch on the shoulder changes where the sleeve head sits. An inch on the waist is the difference between a blouse that closes and one that does not. And an inch of error at the cutting table is a garment re-cut, cloth wasted and a customer told to come back next week.
These are the rules that stop that happening, the three measurements almost everybody takes wrong, and the sheet that makes the next order faster than the first. At the end there is the full set of measurement charts by garment.
Three Things to Settle Before the Tape Comes Out
What She Is Wearing
Measure over what the garment will actually be worn with. A thick kurta, a padded blouse or a loose t-shirt each change the chest figure, and nothing in the draft corrects for it later. If a customer arrives in winter wear, say so on the sheet rather than guessing the difference at the cutting table.
How She Is Standing
Feet together, arms down, weight even, looking straight ahead. A customer who is watching the tape turns her shoulder and adds half an inch across the back. A customer holding her stomach in changes the waist by more than that, and the garment is then made for a body she does not have while she is sitting in it.
Which Footwear
Every length that ends near the floor depends on the shoes. Measure in the footwear she will actually wear, or record the heel height on the sheet. This one line prevents more length complaints than any other.
The 10 Rules for Taking a Measurement
1. Stand at Her Side, Not in Front
Standing face to face, you can see the front of the tape and not the back, so the tape rides up behind. Stand slightly to the side where you can see both, and check the back is level before you read the number.
2. Two Fingers, Not Two Inches
The tape should sit snug against the body with room for two fingers underneath, and the measurement is the body, not the fit. Pulling the tape tight and pulling it loose are both wrong, and both are habits that are invisible until two people measure the same customer.
3. Measure the Body, Add the Ease Later
Never measure loose to allow for comfort. Ease is a number in the draft, written on the sheet, the same every time for that garment. Ease hidden in the tape reading cannot be repeated, cannot be checked and disappears the moment somebody else cuts the order.
4. Find the Waist With a Cord
Tie a soft cord round the middle and let the customer move. It settles at the natural waist on its own, which is a more reliable line than anyone's eye. Mark it and measure from it. On a saree petticoat, measure from where the cord will actually be tied instead, which is lower.
5. Take Vertical Measurements Down the Front
On a woman's body the front travels further than the back over the same vertical distance, because it goes over the bust. A length taken down the back comes out short at the centre front, and the finished garment rides up. This one rule prevents most length complaints on blouses, kurtis and Anarkalis.
6. Measure Over-Garments Over the Garment Below
A waistcoat, a jacket or a shrug never touches the body. Measure it over the shirt or kurta it will be worn on top of, then add the ease on top of that, and do not add an allowance for the shirt as well.
7. Write the Footwear and the Fabric on the Sheet
Length depends on the shoes. Length also depends on whether the cloth will shrink. An unwashed cotton and a polyester of the same measurement need different lengths, and six months later nobody remembers which the last order was.
8. Never Copy a Length From Last Year
Adults change by an inch without noticing and children change by several. A returning customer is an opportunity to check the record, not a reason to skip the tape. Take the measurements again and compare.
9. Keep Body Figures and Finished Figures in Separate Columns
Some numbers are the body, such as chest and waist. Others are the garment, such as mohri width, hem sweep or a churidar's extra length. Mixing them in one column is how a finished figure gets ease added to it a second time.
10. Question Anything That Moved More Than an Inch
If a measurement differs from the last order by more than an inch, take it again before you write it down. Most of the time it is a tape that slipped. Occasionally it is real, and then it is worth knowing before you cut rather than after.
The Three Measurements Almost Everybody Takes Wrong
Measurement | The usual mistake | How to take it |
|---|
Shoulder width | Measured to the arm rather than to the shoulder point, adding half an inch each side | Find the bone at the end of the shoulder with your fingers and measure point to point across the back |
Armhole | Taken flat across the pattern or guessed from the chest | Round the arm, through the armpit and over the shoulder point, with the arm hanging down |
Waist | Taken where the trouser sits rather than at the narrowest point, or with the stomach held in | Use the cord in rule 4 and take the reading while the customer is breathing normally |
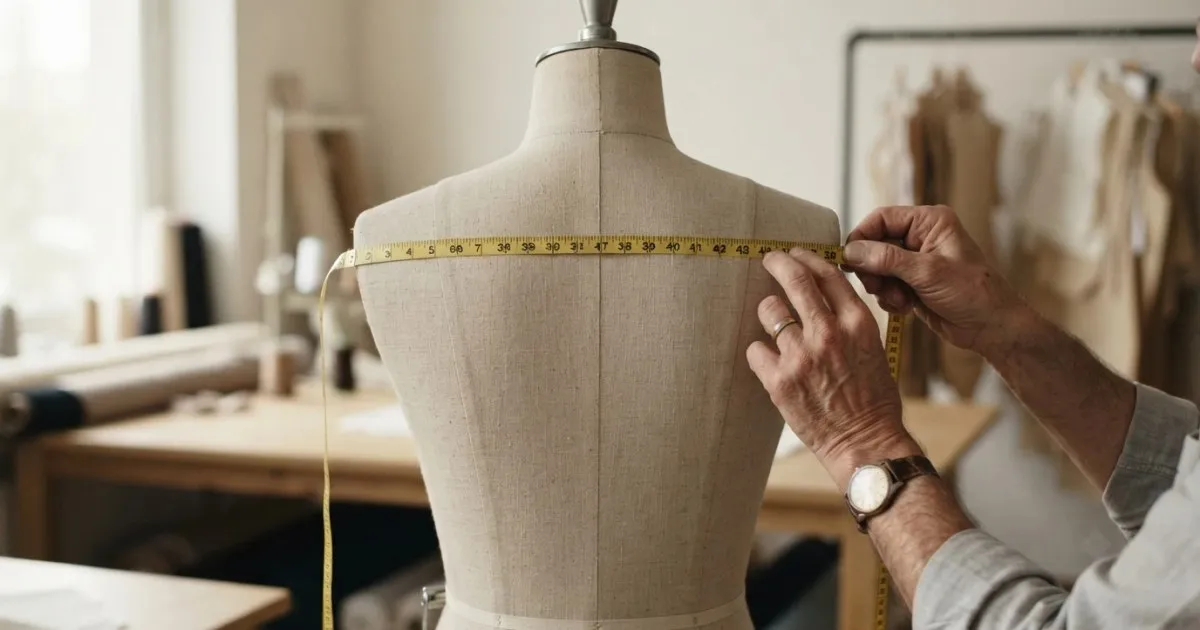
All three are the measurements that decide how a garment hangs from the shoulders. An error anywhere else shows as loose or tight; an error in these three shows as drag lines, and drag lines are what a customer photographs and sends back.
The Sheet Is Half the Job
A measurement that is taken perfectly and written badly is worth nothing six months later. The sheet needs the date, the garment, the fabric, the footwear, the ease used and which garment anything was measured over.
Write the fit in words as well as numbers. Fitted, semi-fitted and loose mean something to the customer and nothing to a column of figures, and the next order will be judged against what she remembers rather than what was recorded.
Keeping those sheets where they can be found again is its own problem, and most shops solve it badly - there is more on that in the measurement book every shop loses.
When a garment does come back, the alteration is usually traceable to one measurement on the sheet, and the garment alteration guide works backwards from the symptom to the cause.
Measurement Charts by Garment
Each chart below lists every measurement that garment needs, where to take it and how much ease to add.
Ladies Wear
Blouse cutting measurement chart - the saree blouse, dart placement and back opening.
Kurti cutting measurement chart - six kurti shapes from one bodice block, flare and slit height.
Palazzo cutting measurement chart - the wide straight leg and how much cloth it takes.
Lehenga cutting guide - kali count, hem sweep and the kali template arithmetic.
Nighty cutting measurement chart - the loose fit that still has to sit on the shoulders.
Gents Wear
Gents shirt cutting measurement chart - the twelve measurements, collar, cuff and yoke.
Gents pant cutting measurement chart - rise, seat and the crease line.
Coat cutting measurement chart - chest, shoulder slope and the balance of front to back.
Sherwani cutting measurement chart - the long formal draft and its detailing.
Kurta pyjama cutting measurement chart - the daily order most often cut from memory.
Children and Bulk
Kids frock cutting measurement chart - growing room and where to put it.
School uniform cutting measurement chart - size sets rather than individual measurements.
Fabric consumption chart - how much cloth each garment needs, for quoting.
What Changes When the Measurements Go Into a Computer
Taking the measurement is still a person with a tape. What changes is everything that happens to the number afterwards.
The ease stops being a habit and becomes a setting, so the same garment is cut the same way whoever is at the table. The sheet stops being a page in a book that goes missing and becomes a record attached to the customer, with the date, the fabric and the footwear on it.
And a measurement that is out of character with the last order can be flagged rather than quietly cut, which is rule ten enforced by something that does not get tired at six in the evening.
The drafting itself follows from there: pattern making software turns the sheet into a pattern, nests it to your cloth width and prints or cuts the marker at full size.
Most Re-Cutting Starts at the Tape, Not the Scissors
Cutting is a skill that takes years. Measuring is a habit that takes an afternoon to fix, and it causes more returns than cutting does.
Stand at her side, keep two fingers under the tape, measure the body and add ease on paper, find the waist with a cord, take verticals down the front, and write the footwear and the fabric on the sheet. Then take the chart for the garment and work through it in order. Everything above is free. A re-cut is not.
Frequently Asked Questions
How tight should a measuring tape be?
Snug against the body with room for two fingers underneath. The reading is the body measurement, not the fit. Ease is added afterwards in the draft, where it can be written down and repeated.
Should measurements be taken over clothes?
Over the garment the finished item will be worn with. A thin vest for a blouse, the shirt or kurta for a waistcoat. Never over winter wear or a thick jacket, and if that is all the customer is wearing, note it on the sheet.
Where is the natural waist?
Tie a soft cord round the middle and let the customer move. It settles at the narrowest point on its own. That is the natural waist, and it is usually higher than where a trouser sits.
Why should lengths be measured down the front?
On a woman's body the front travels further than the back over the same vertical distance because it passes over the bust. A length taken down the back finishes short at the centre front and the garment rides up.
How often should a regular customer be re-measured?
Every order. Adults change by an inch without noticing and children change by more. Take them again and compare against the record; anything that moved more than an inch is worth taking twice.
Keep Every Customer's Measurements in One Place
Fashion Dot CAD stores each customer's sheet with the date, the fabric and the ease used, drafts the pattern from it and keeps the ease consistent across everyone in the shop. See what it costs on the tailoring CAD software price page.
See Your Own Measurements Drafted Live
Bring one customer's sheet to a free demo and we will draft the garment from it, print the pattern full size and show you the marker on your own fabric width. Book a free demo at a time that suits your shop.